At the end of the Montréal Métro post I said Tokyo would need a much bigger board, a much smaller LED pitch, or both. It's both.
This one isn't done. The map is finished, the KiCad board is built from it, and the chain is routed. This week I moved the power off tracks and onto copper pours. There are still 38 connections that aren't connected, and I haven't ordered anything.
What it is
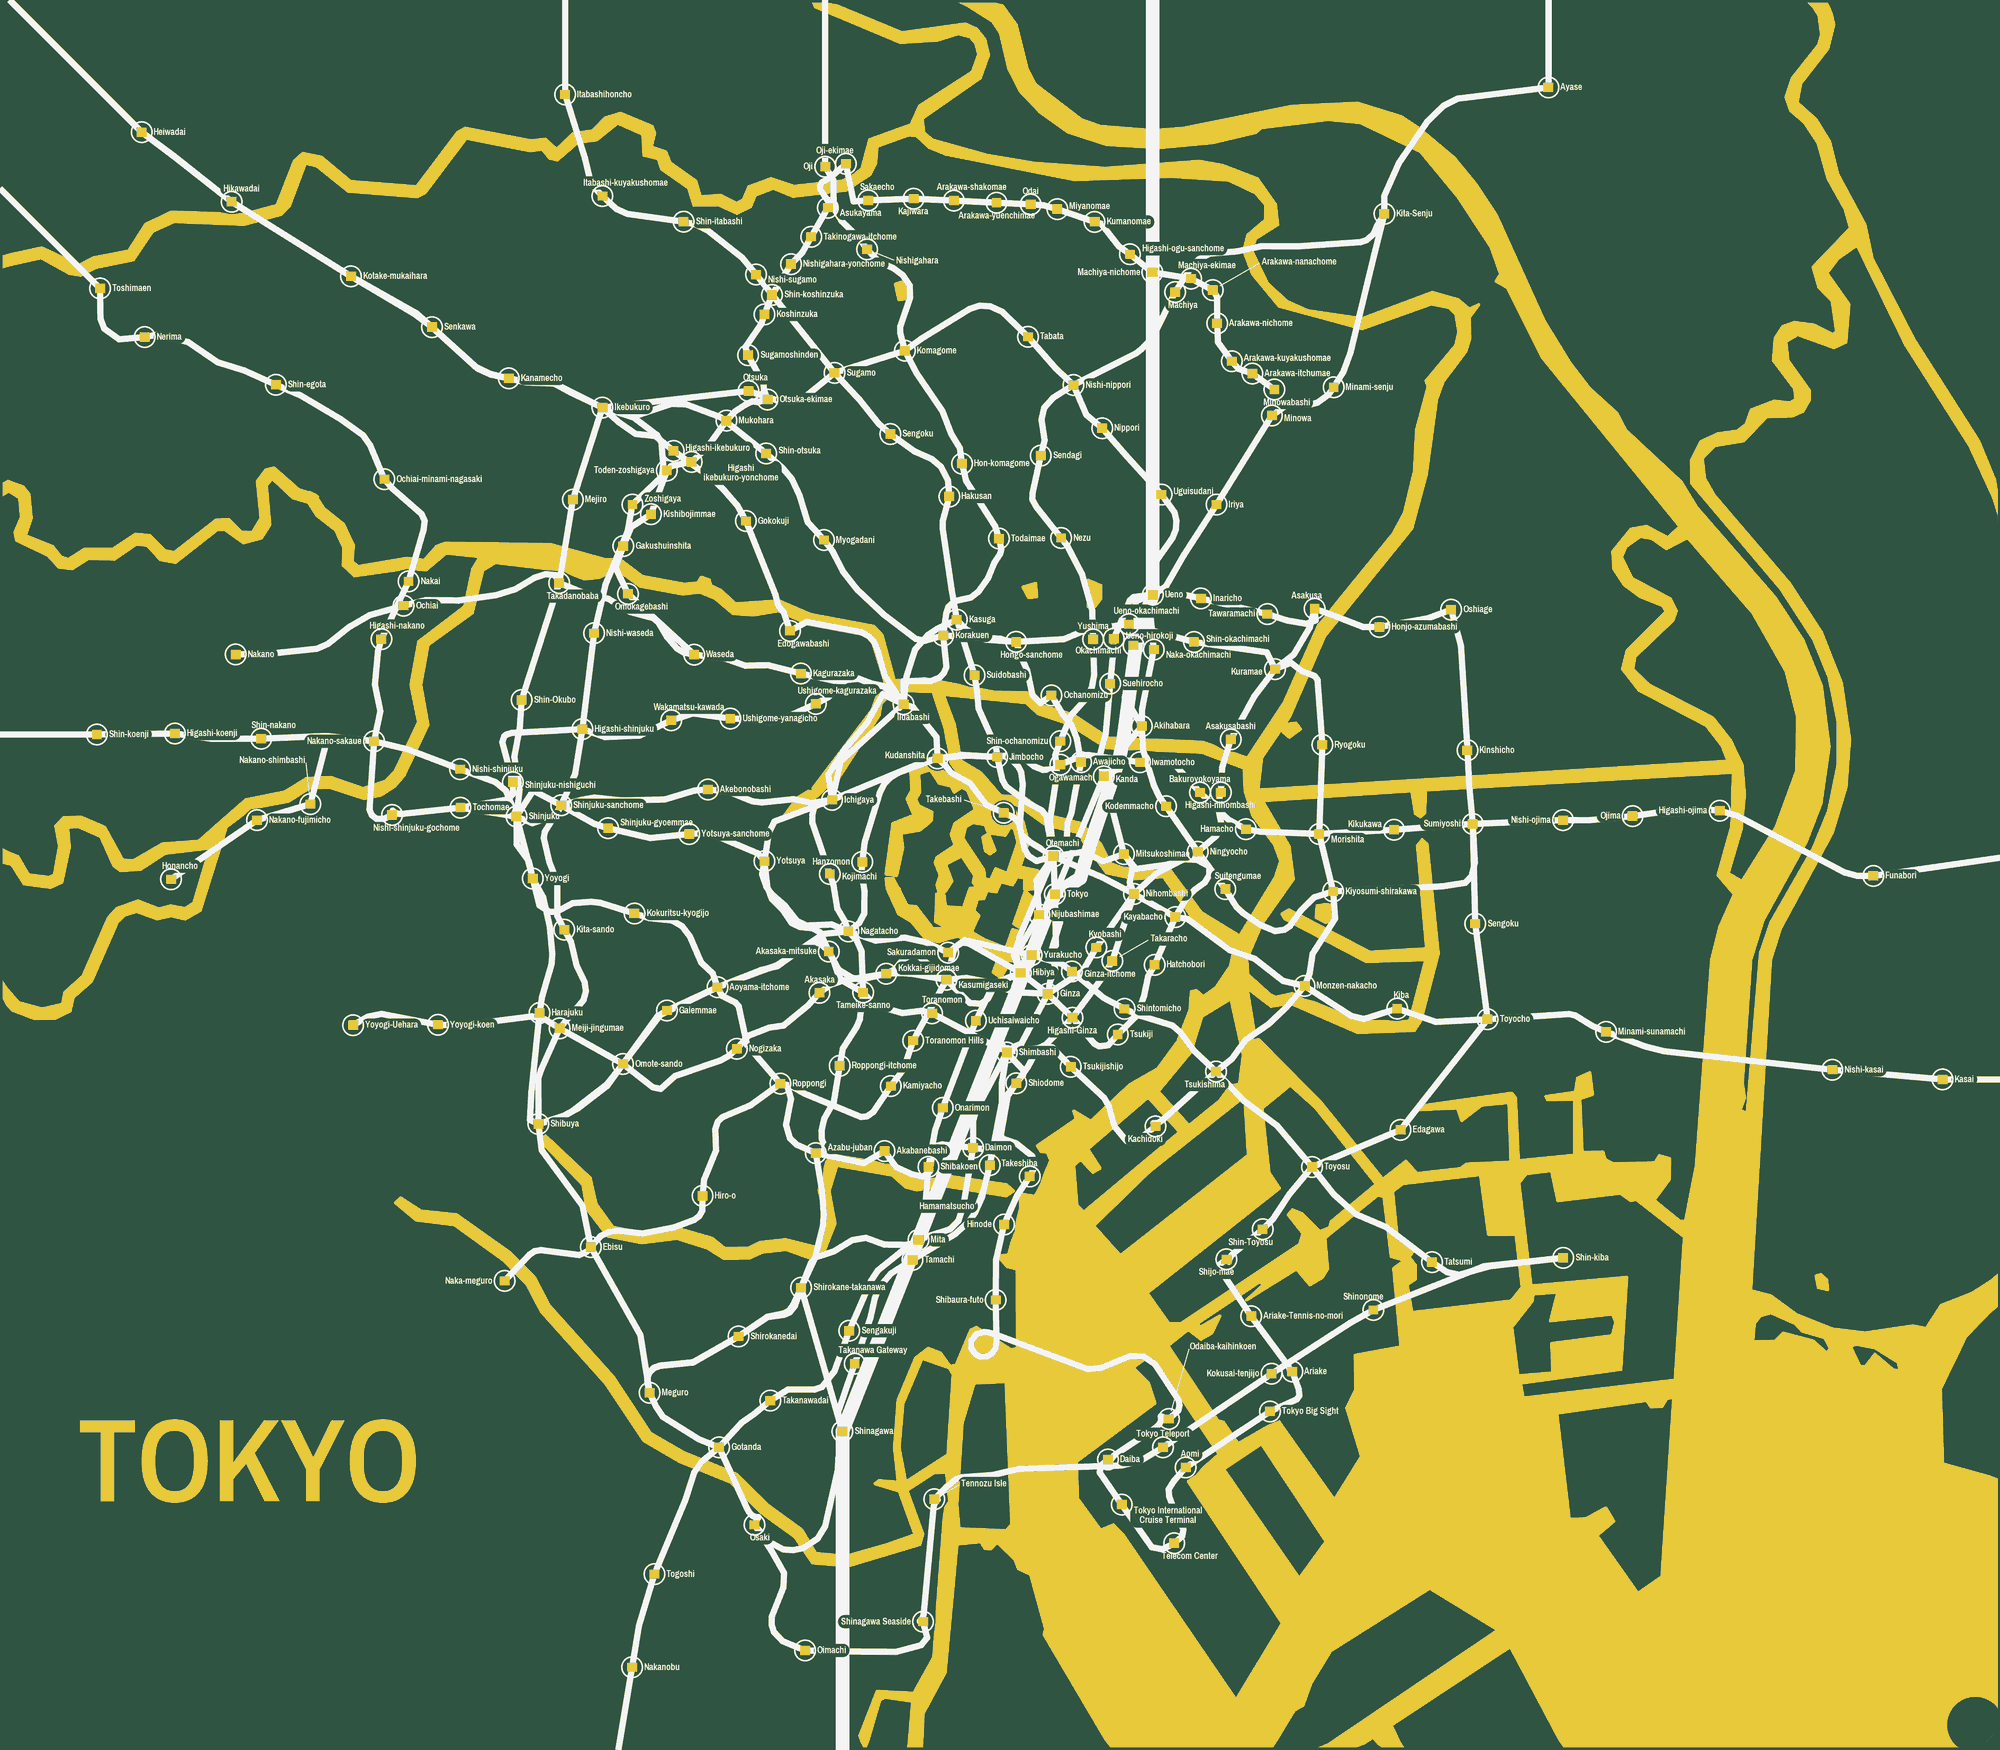
320 × 280 mm, 2 layers, ENIG, 248 WS2812B LEDs, one per station. Eighteen lines: Tokyo Metro's nine, Toei's four, the JR Yamanote loop, the Toden Arakawa tram, the Yurikamome, the Rinkai line and the Shinkansen. The two Tokyo Metro extensions under construction are on there as well. Same reason as Montréal's Blue line extension: the board will outlast the construction.
Water is bare ENIG copper, so it comes out gold. Lines and labels are white silkscreen.
A Seeed XIAO RP2040 drives it, at a board edge this time. Montréal's USB-C port sits 26 mm into the middle of the back, which I've been annoyed about since. I had a 74AHCT1G125 level shifter in the plan for the data line and dropped it on cost, so the XIAO's 3.3 V data goes into the 5 V LEDs through a 330 Ω resistor, same as Montréal.
Labels are romanised English, no macrons. "Otemachi", not "Ōtemachi". KiCad's stroke font has no macron glyph I trust, and Vancouver taught me the editor lies about what actually plots. Kanji would plot, KiCad 10 does TrueType. But at 1.1 mm you can't read them, and big enough to read, they don't fit.
What changed from Montréal
Montréal ended up schematic. Straight lines, rounded corners, stations moved off where they really are. I started Tokyo the same way and threw it out.
The pipeline had been lying to me. The Overpass query only ever fetched each route's stop nodes, which gives you the station order and nothing else. So every leg between two stations was a straight hop, by construction. The "natural" variant wasn't natural, just un-straightened.
Fetching the way geometry instead, 55 relations and 3,212 ways, and cutting out the piece of each line between each pair of stations, gives real track. 264 of the 333 legs now follow the rails the trains actually run on, bridges and tunnels included.
The octolinear version had stations sitting a mean 499 m from where they belong, and five pairs too close together to fit an LED between them. The organic one is 6 m, and no pairs too close.
I like it a lot more than the schematic version. It shows off how chaotic the Tokyo Metro is. It isn't straight lines like London.
Scope moved too. Phase 0 settled on 216 LEDs and a 400 × 289 mm board, and it ended up at 248 LEDs on 320 × 280 mm. The extra stations are the Yamanote loop and four other lines. The smaller board is a crop, not a rebuild.
Where it has been hard
The core. Ōtemachi, Ginza, Tokyo, Kasumigaseki, Nihombashi. Montréal taught me the dense cluster decides the board, and it did again here. The first label pass put 55 labels on top of a route, white on white.
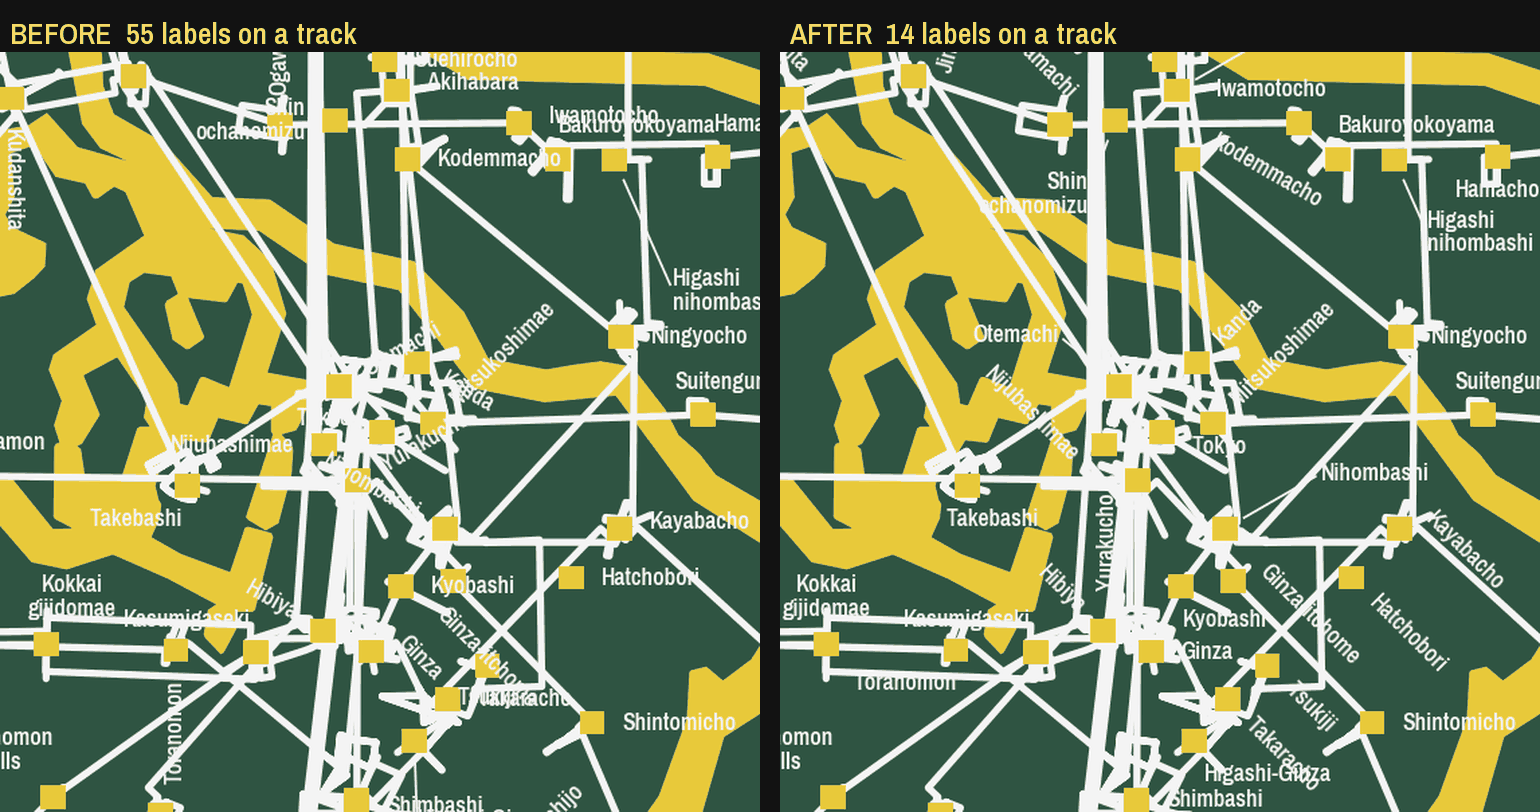
The fix was giving each name a capsule that knocks the route out behind it, so a name can sit across a line and still be read. That got it to 14, and those are hand work in KiCad, frozen back into the data file so a rebuild doesn't eat them.
The tools got too slow to iterate with. At 251 stations the label optimiser took 3.34 seconds a station. One greedy pass was 14 minutes. The annealing pass on top ran for hours, and the first attempt died in a timeout with nothing to show for it. Nearly all of that was one function walking every point of every water polygon, for every candidate position, for every label. Tokyo Bay is thousands of points.
Power. 248 LEDs at full white is about 15 A. The firmware cap stays at 900 mA until I've proven the supply and the injection points. There's no power connector on the board yet either. It's decided on paper, a USB-C input of its own plus a terminal block. I just haven't drawn it.
The ground pour, again. 67 of the LEDs sit in a hole cut out of the water, so the front pour is in islands. Montréal's lesson was to script the island count instead of eyeballing it, and that one held up. This week I moved power onto proper planes, 5 V on the front and ground on the back. The power routing went from 3,787 mm of track down to 940 mm. 285 of the 301 ground pads now reach the back plane through a via of their own.
The thing that cost me the most time was dumber than any of that. A script decided a pad was connected if there was a via near it. That works while the routing exists, because the via is only near the pad because a track runs to it. Rip the tracks out and 135 pads are sitting a millimetre from a via that reaches nothing. Nothing errors and nothing warns. It just looks finished. Third time on this board I've let distance stand in for connection.
What's next
Finish the routing. 16 ground pads are boxed in with nowhere to put a via, and 10 power crossings still won't go through the back layer. Draw the power input, then run the pre-order checklist, which is mostly made of things that bit me on Montréal.
The pipeline, the KiCad files and the lessons learned are on the GitHub repo. More once it's routed and ordered.