
The Giant Claw Game! - Problems
The Giant claw game can be broken down in to a few parts. The Claw, The Joystick, The Gantry/Cube, The XY table, The Cart, Control system
The Claw
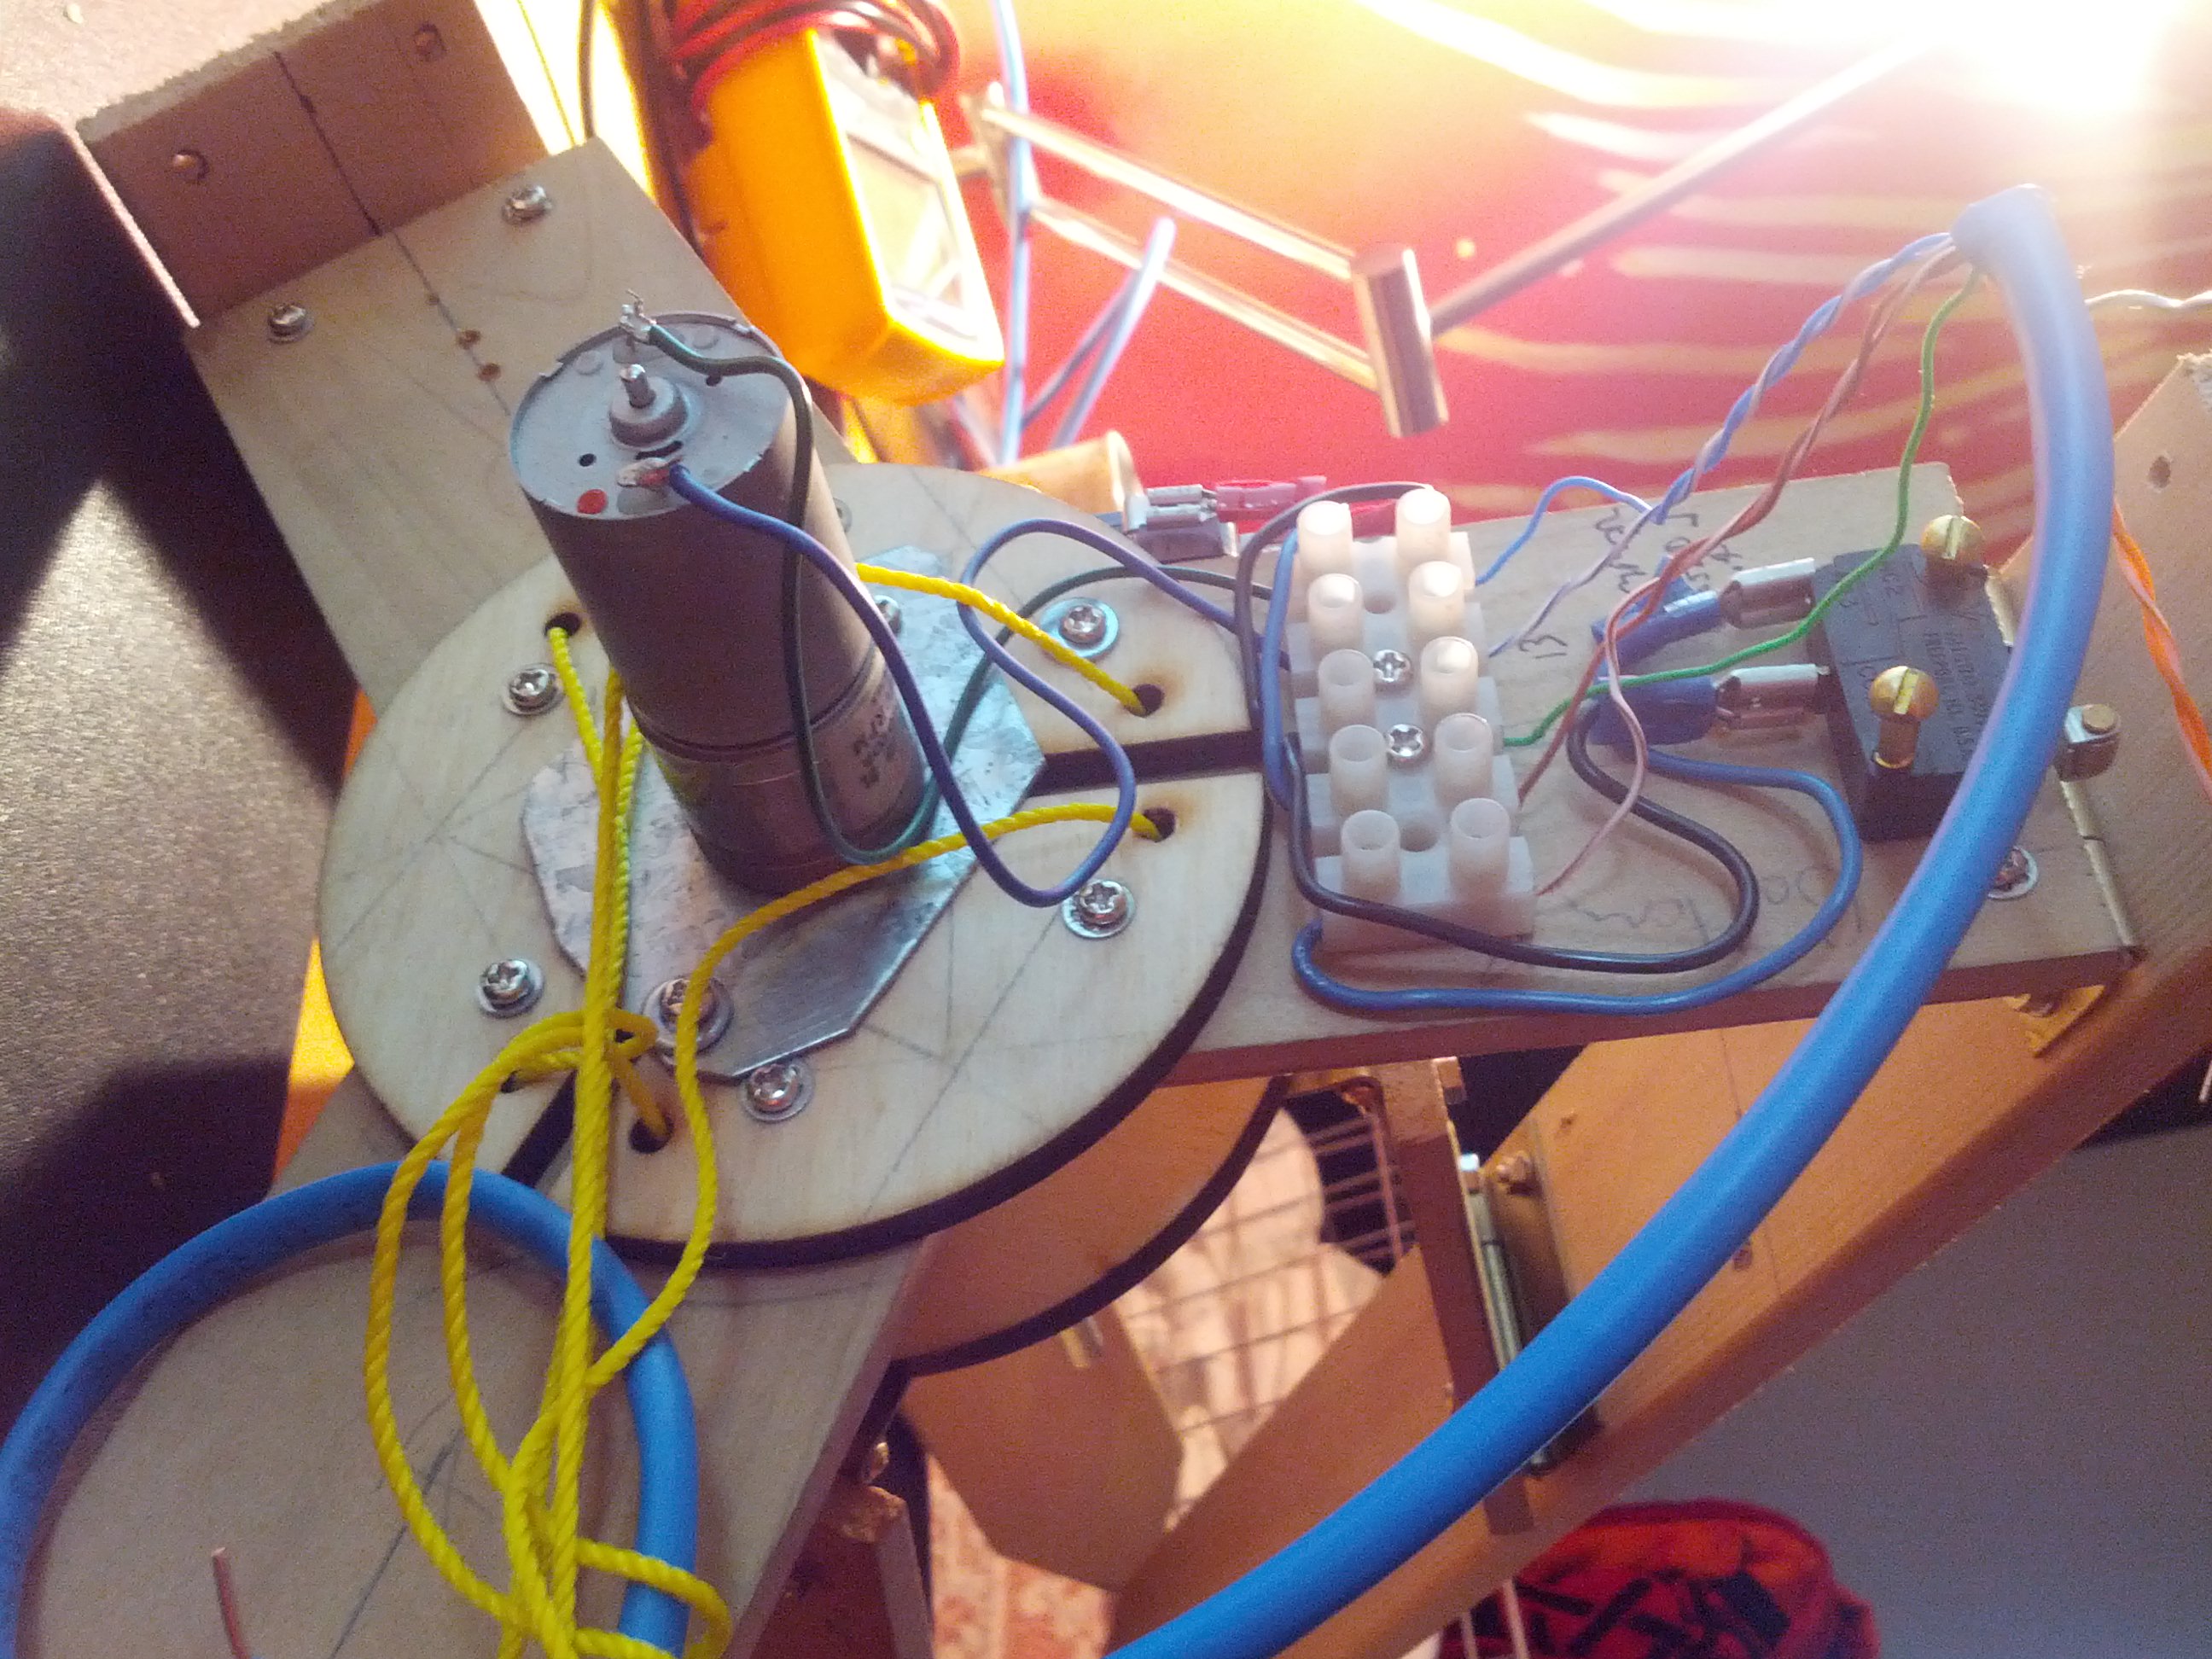
 The claw is working and it is in pretty good shape. The claw can open and closes and pick up toys. It uses a small gear motor attached to the top. The gear motor is kind of slow and takes about 20+ seconds to fully close. I am thinking about replacing this motor with one of the drills to speed it up.
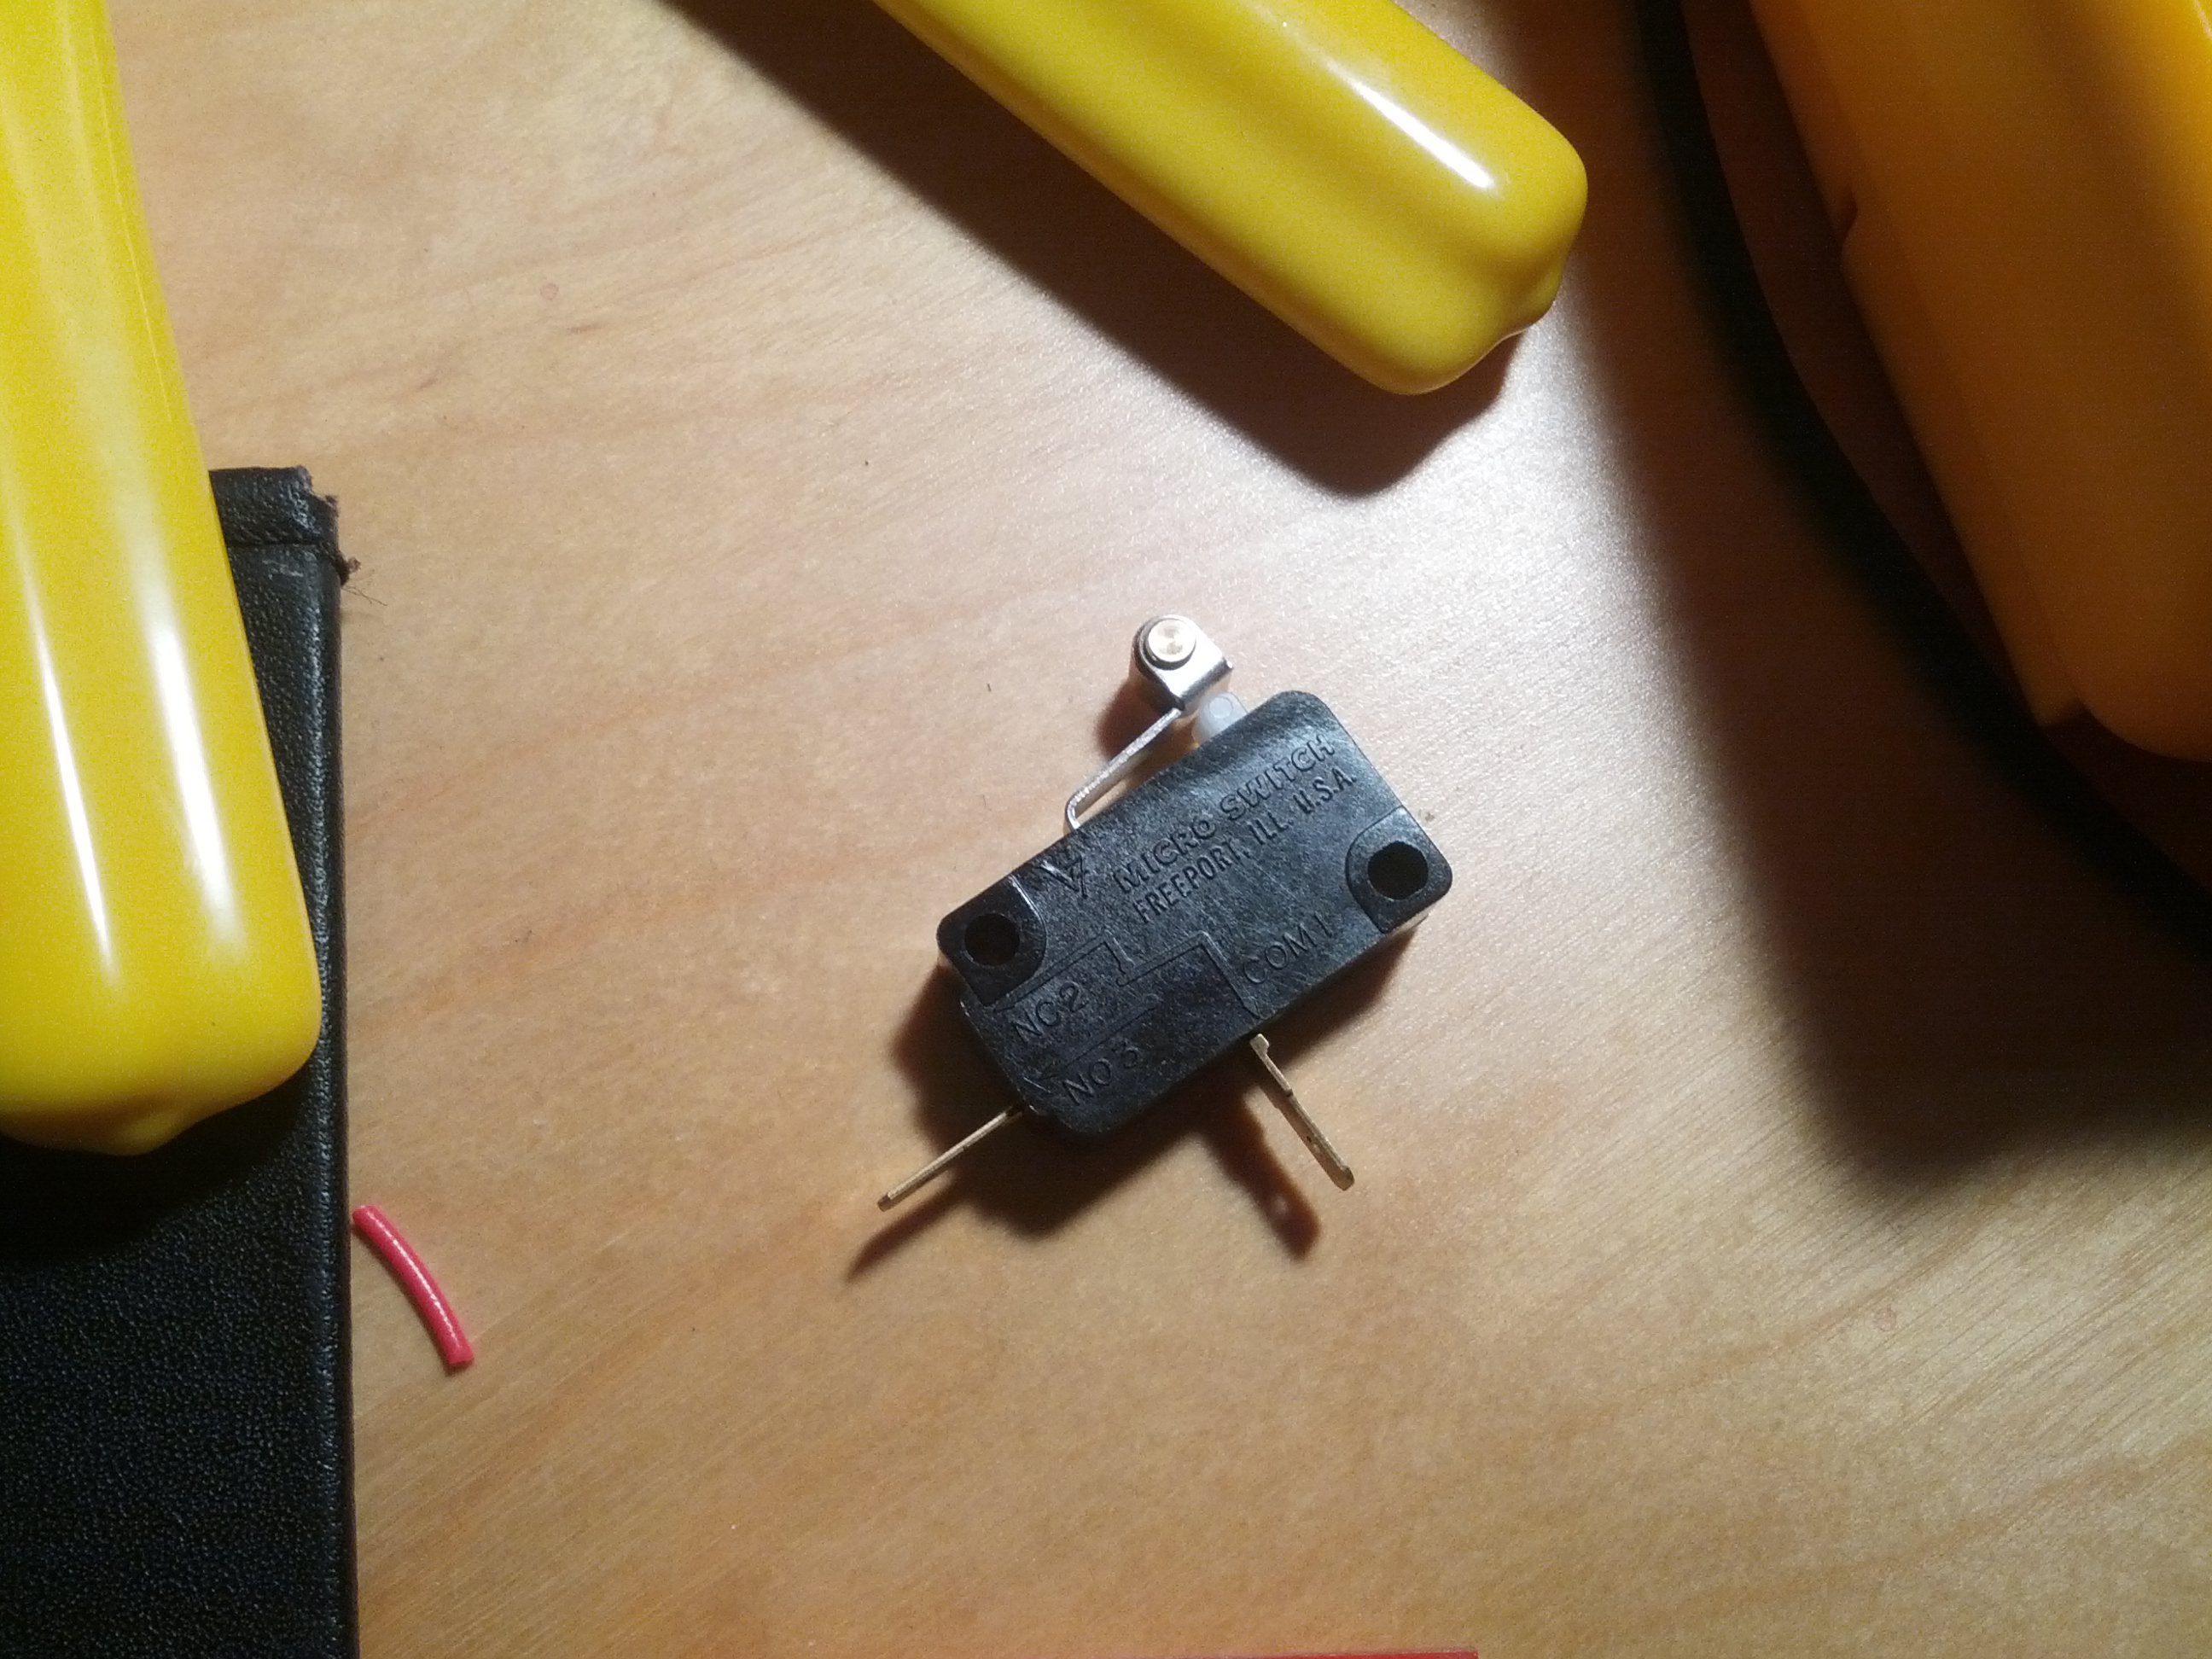
I have attached limit switches to the claw so I can tell when it is fully opened and closed. This prevents the claw from crushing the stuff animals.
Bill of materials
- 2 Cherry limit switches,
- Terminal strip
- Small geared motor
- Motor shaft coupler
- Wood


The Joystick
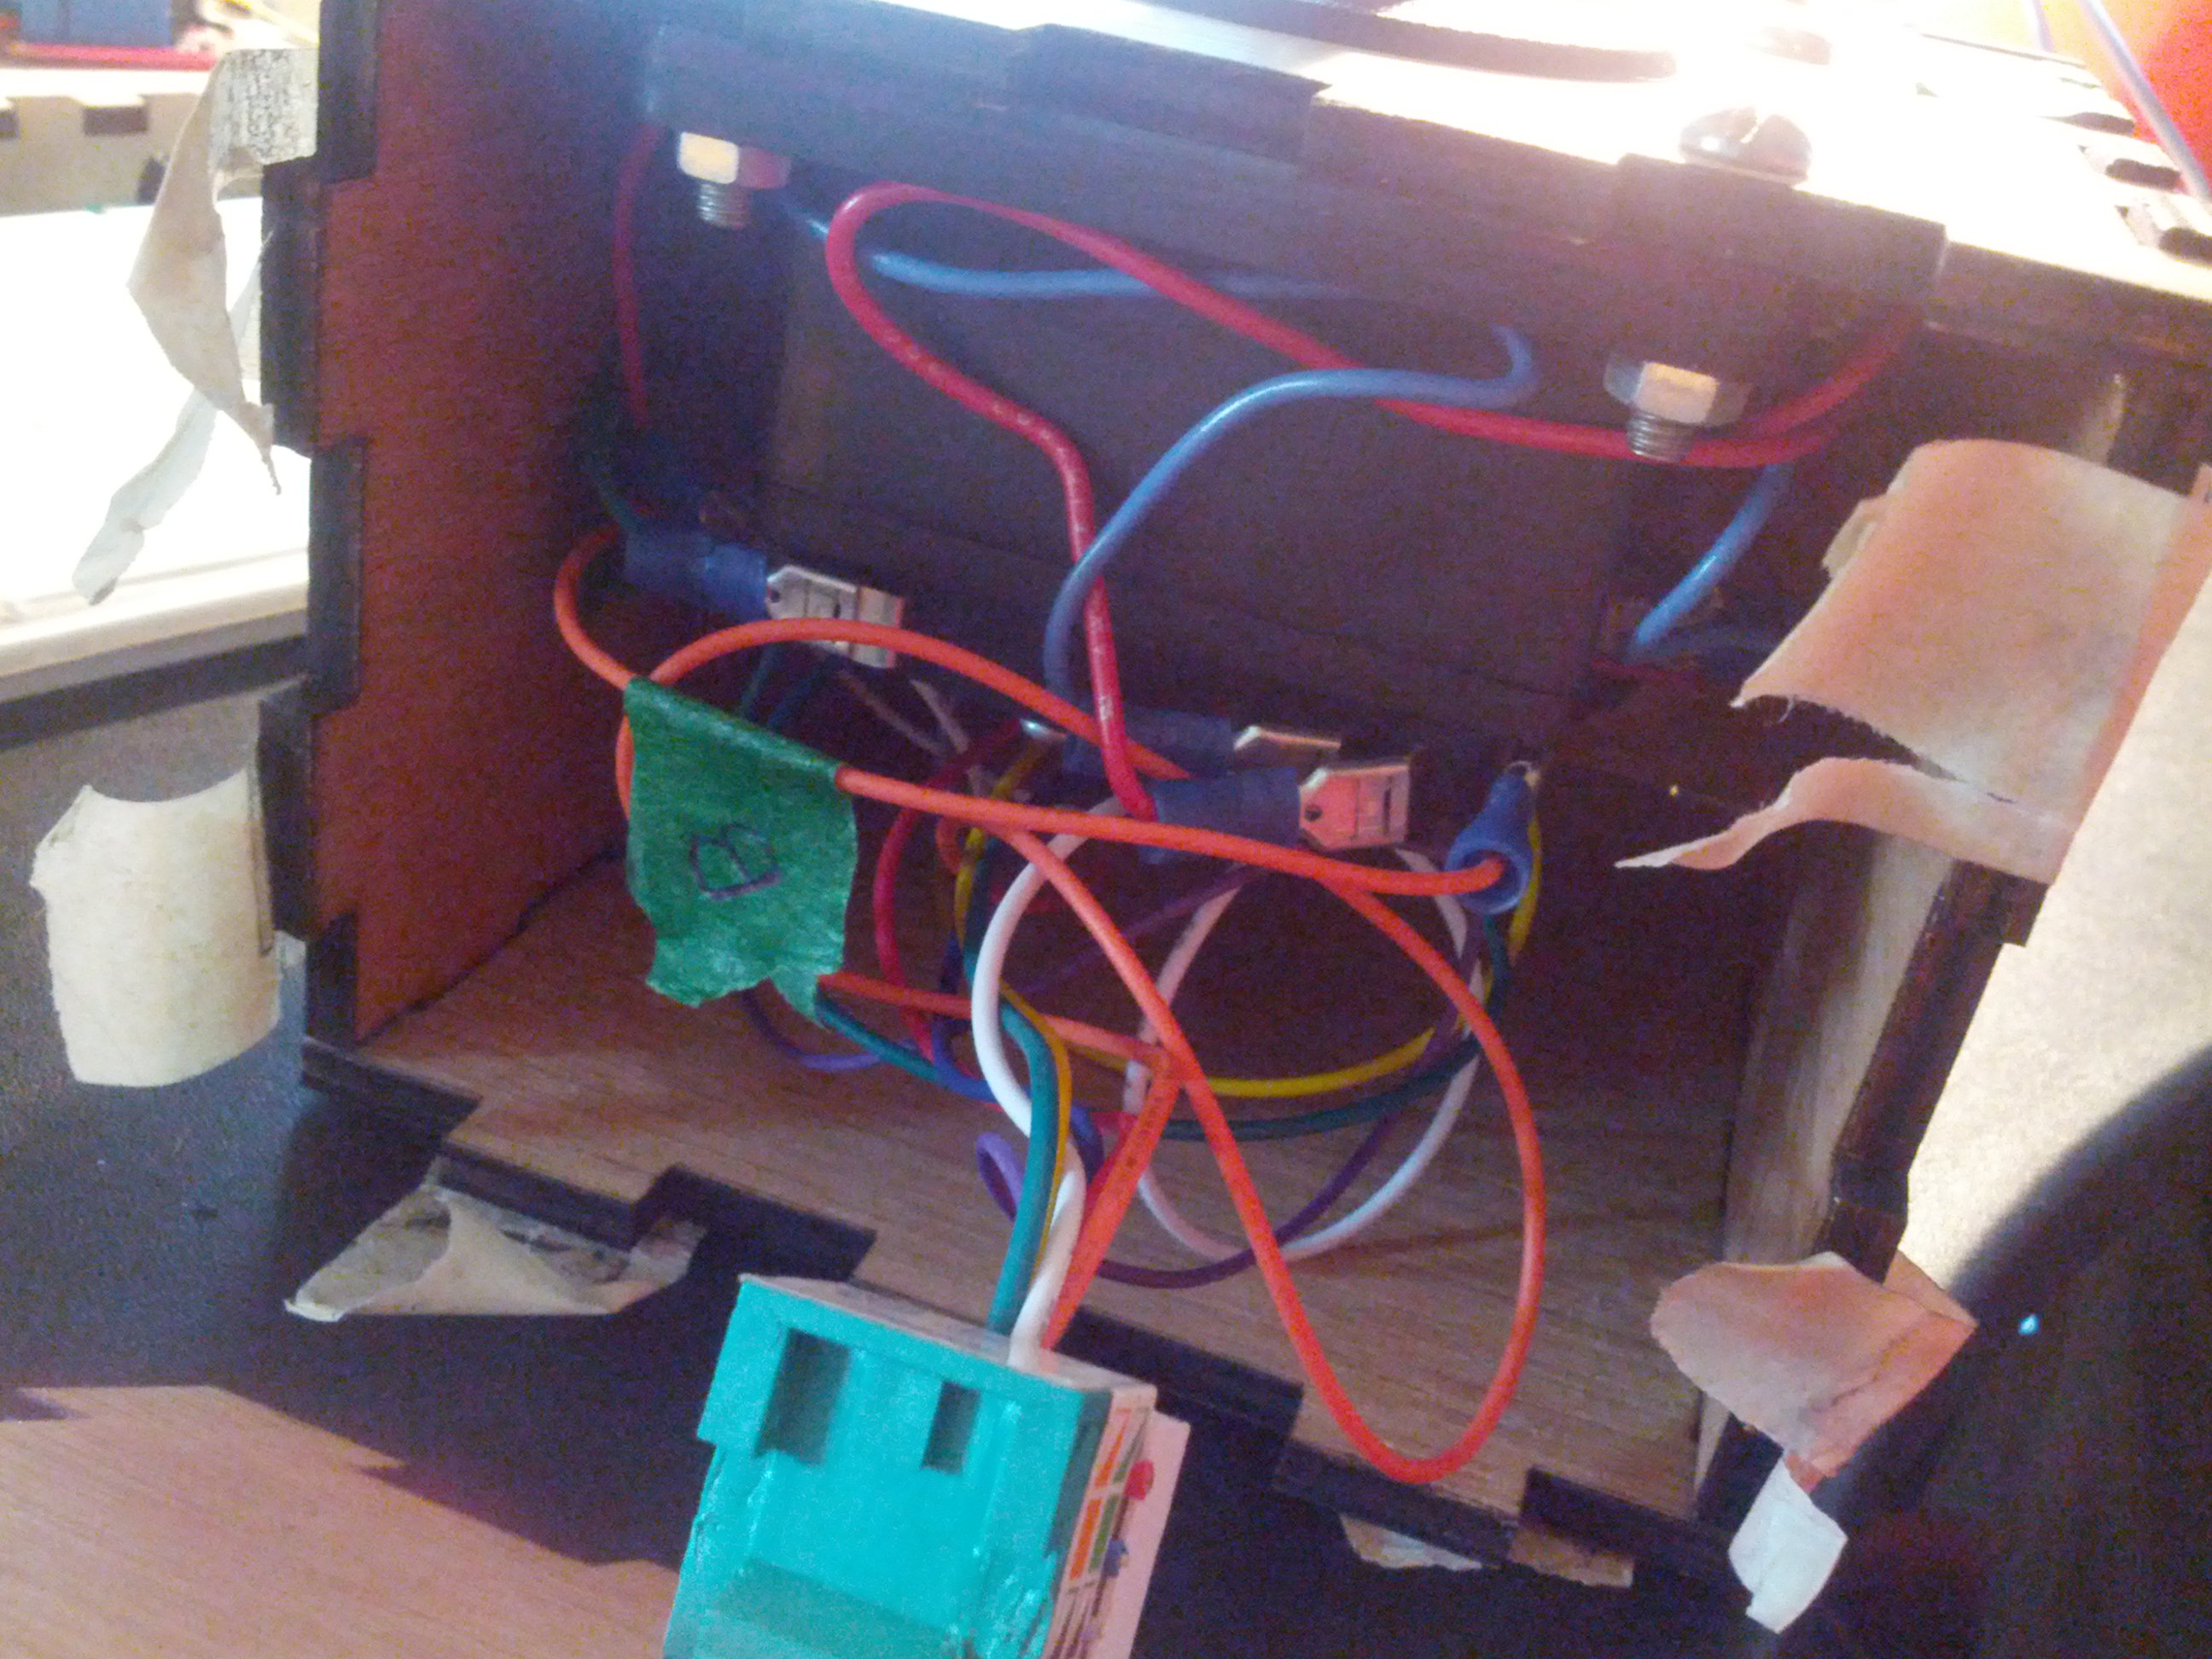
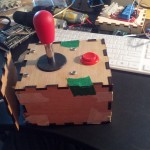 The joystick is the simplest part of this system. It has 4 limit switches and a off the shelf joystick that I picked up from John Jukes. All the wires lead back to a RS45 connector to make setup easier. I wanted to make this part strong in case the kids drop it and kick it around. The only thing left to do here is glue the box together.
Bill of materials
- Wood
- Arcade button
- 5 Cherry limit switches,
- 1 RS45 connector
The Gantry/Cube
The cube is pretty much a large wooden box made out of 2x3x8. I added trusses to the corners to make it more stable. I added the shelf to the top of the cube to allow the gantry system to ride on top of.
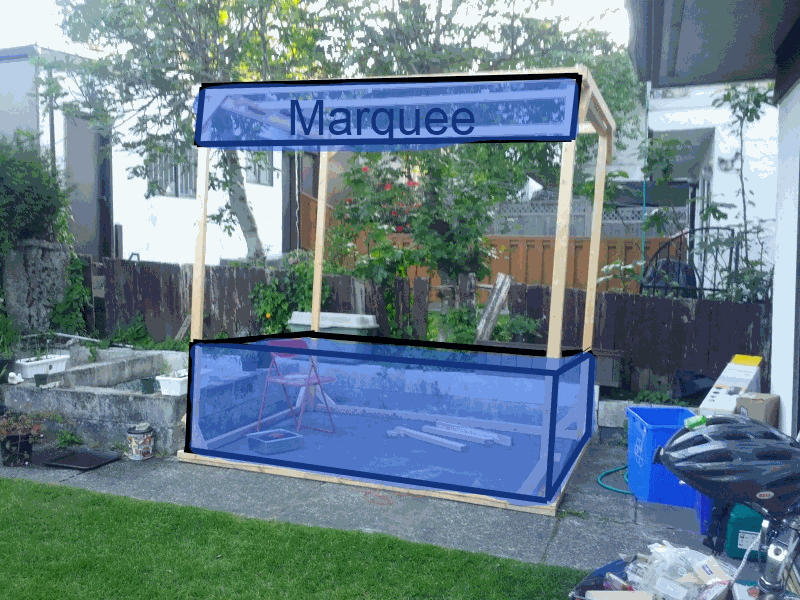 I would like to add a marquee banner to the top of the cube to make it look better. I am also planning on adding some fabric to the bottom so all the toys will gather in the center, making it easier for the kids to pick up a prize.
There is a lot I could do her to make it look better but I am running out of time and I may not get a chance before Breaker/Maker Faire.
Bill of materials
- 16 2x3x8 wood beams.
- 50+ 3" screws
- 4 appliance moving wheels
- 12 pulleys
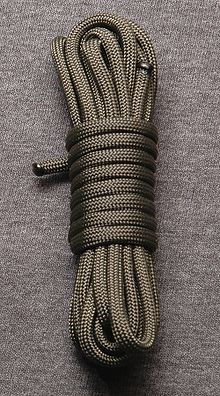
- 45 feet of rope.
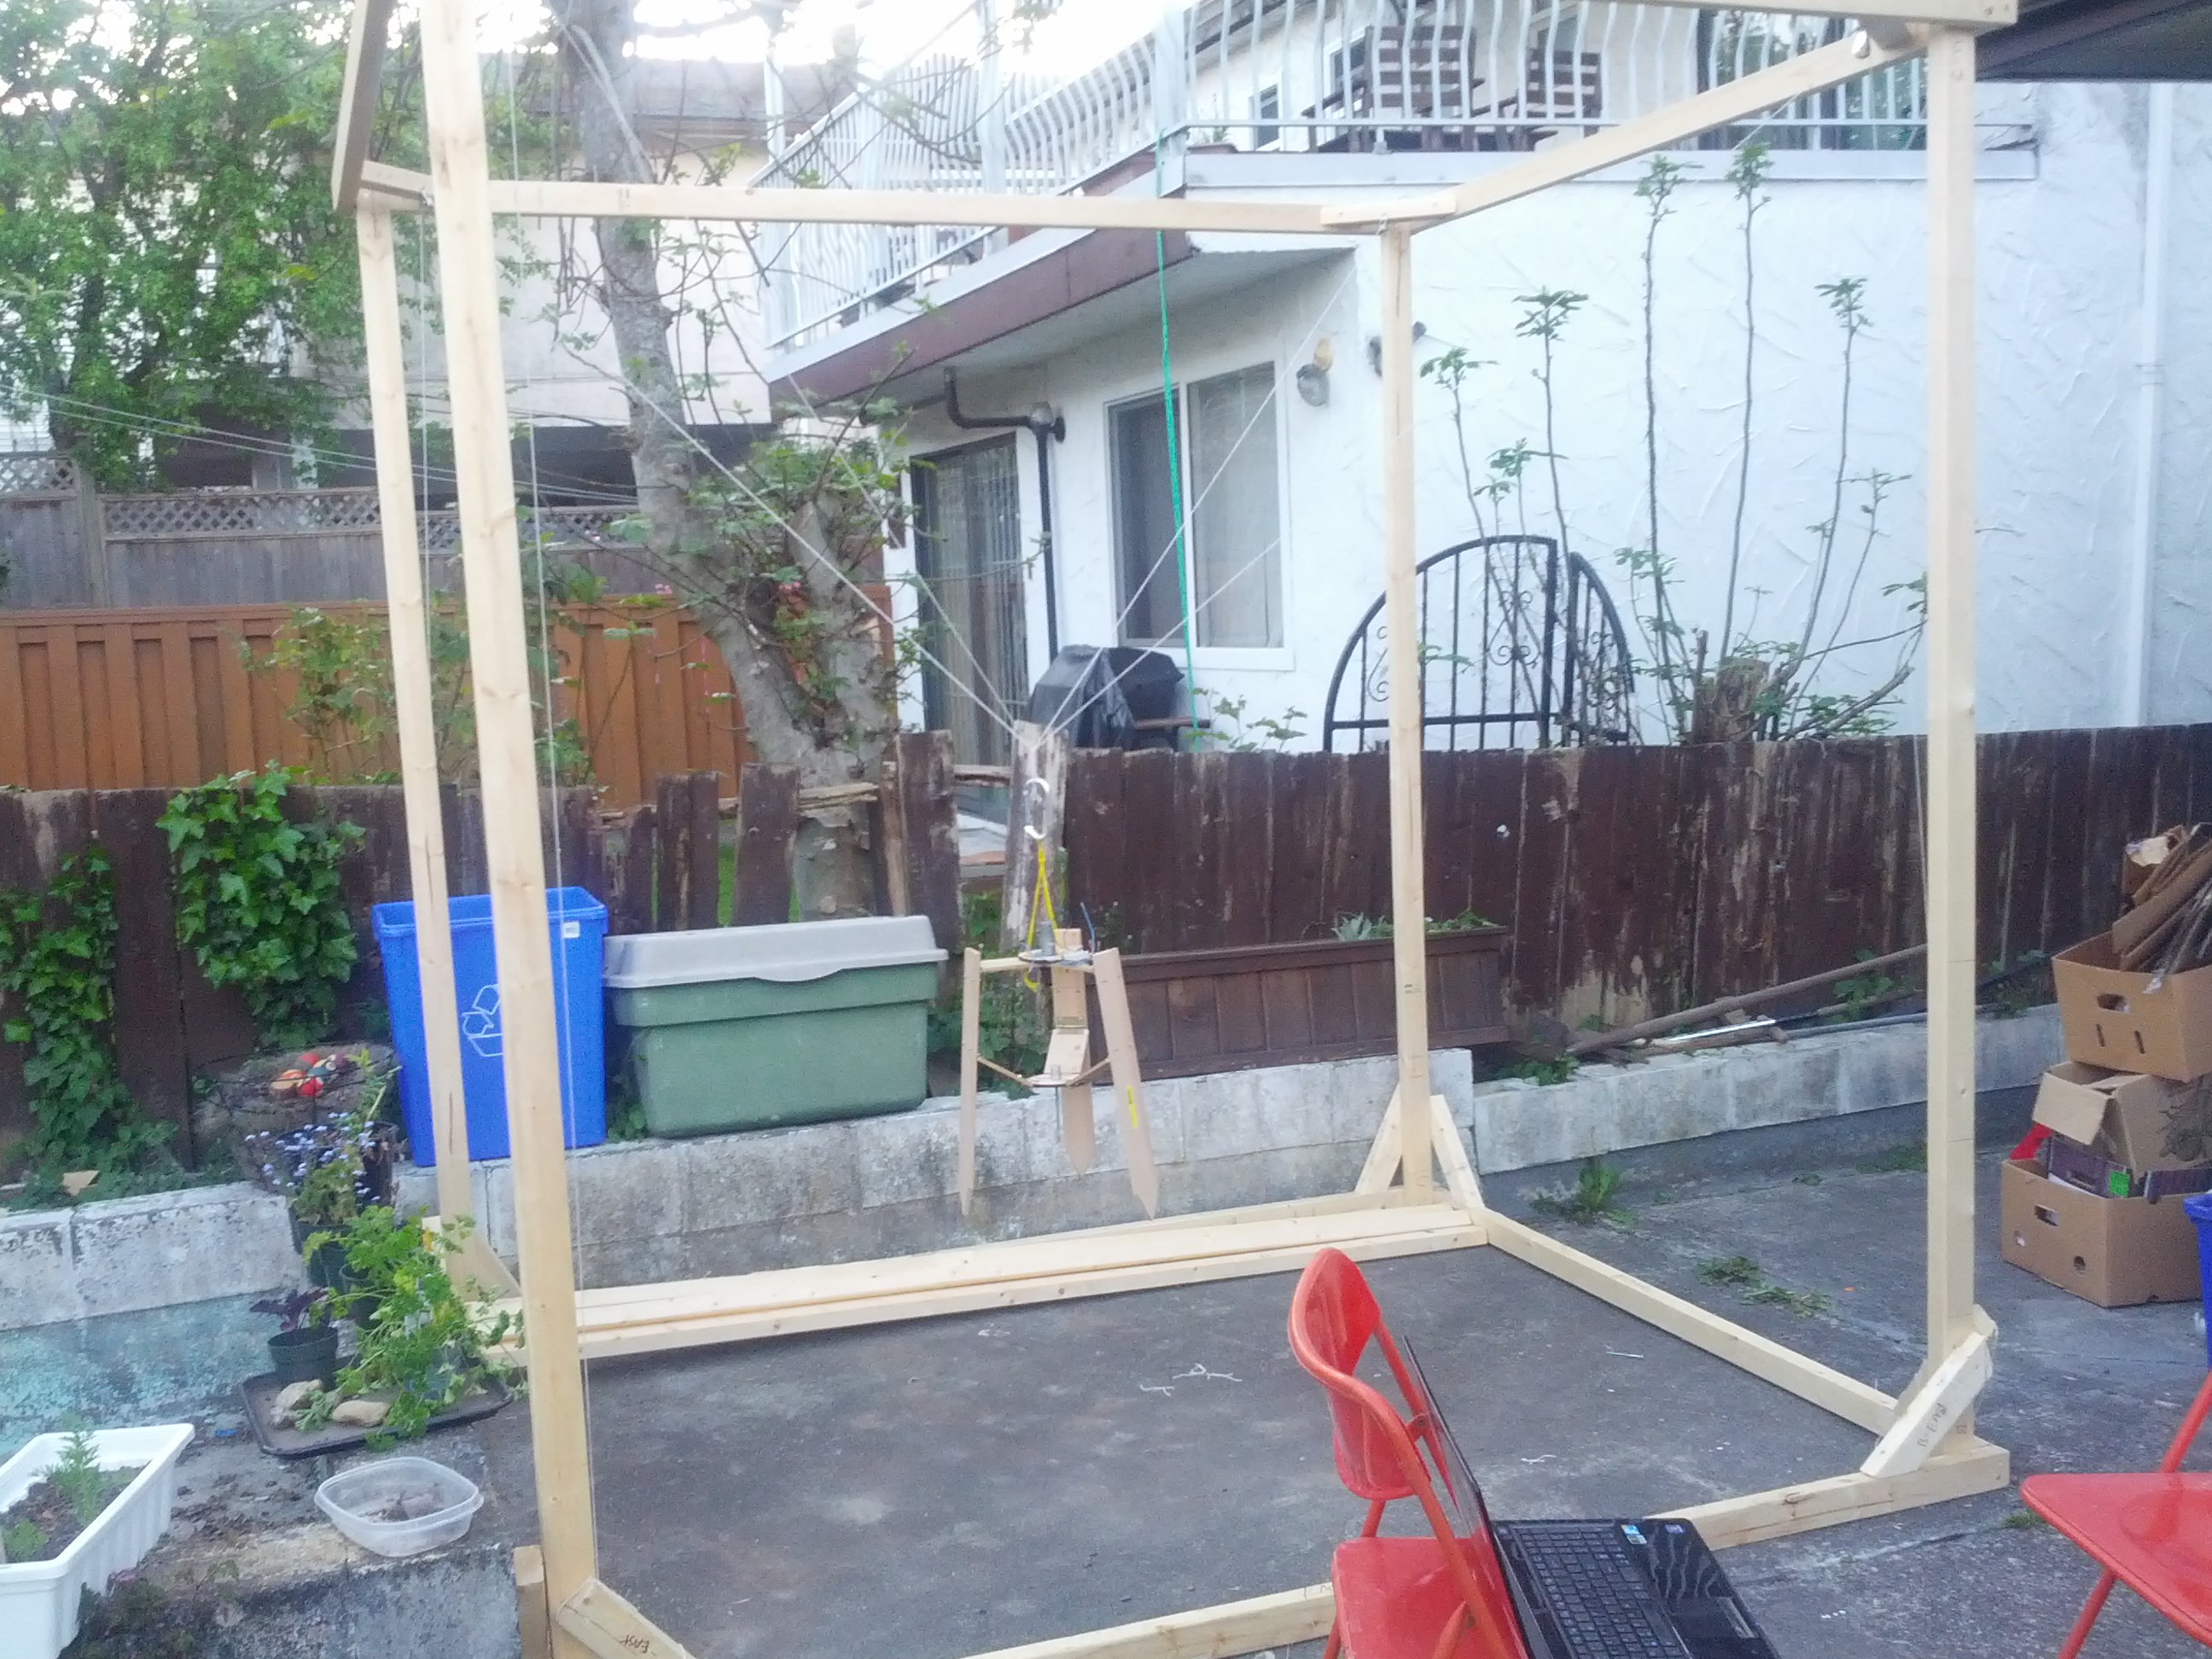


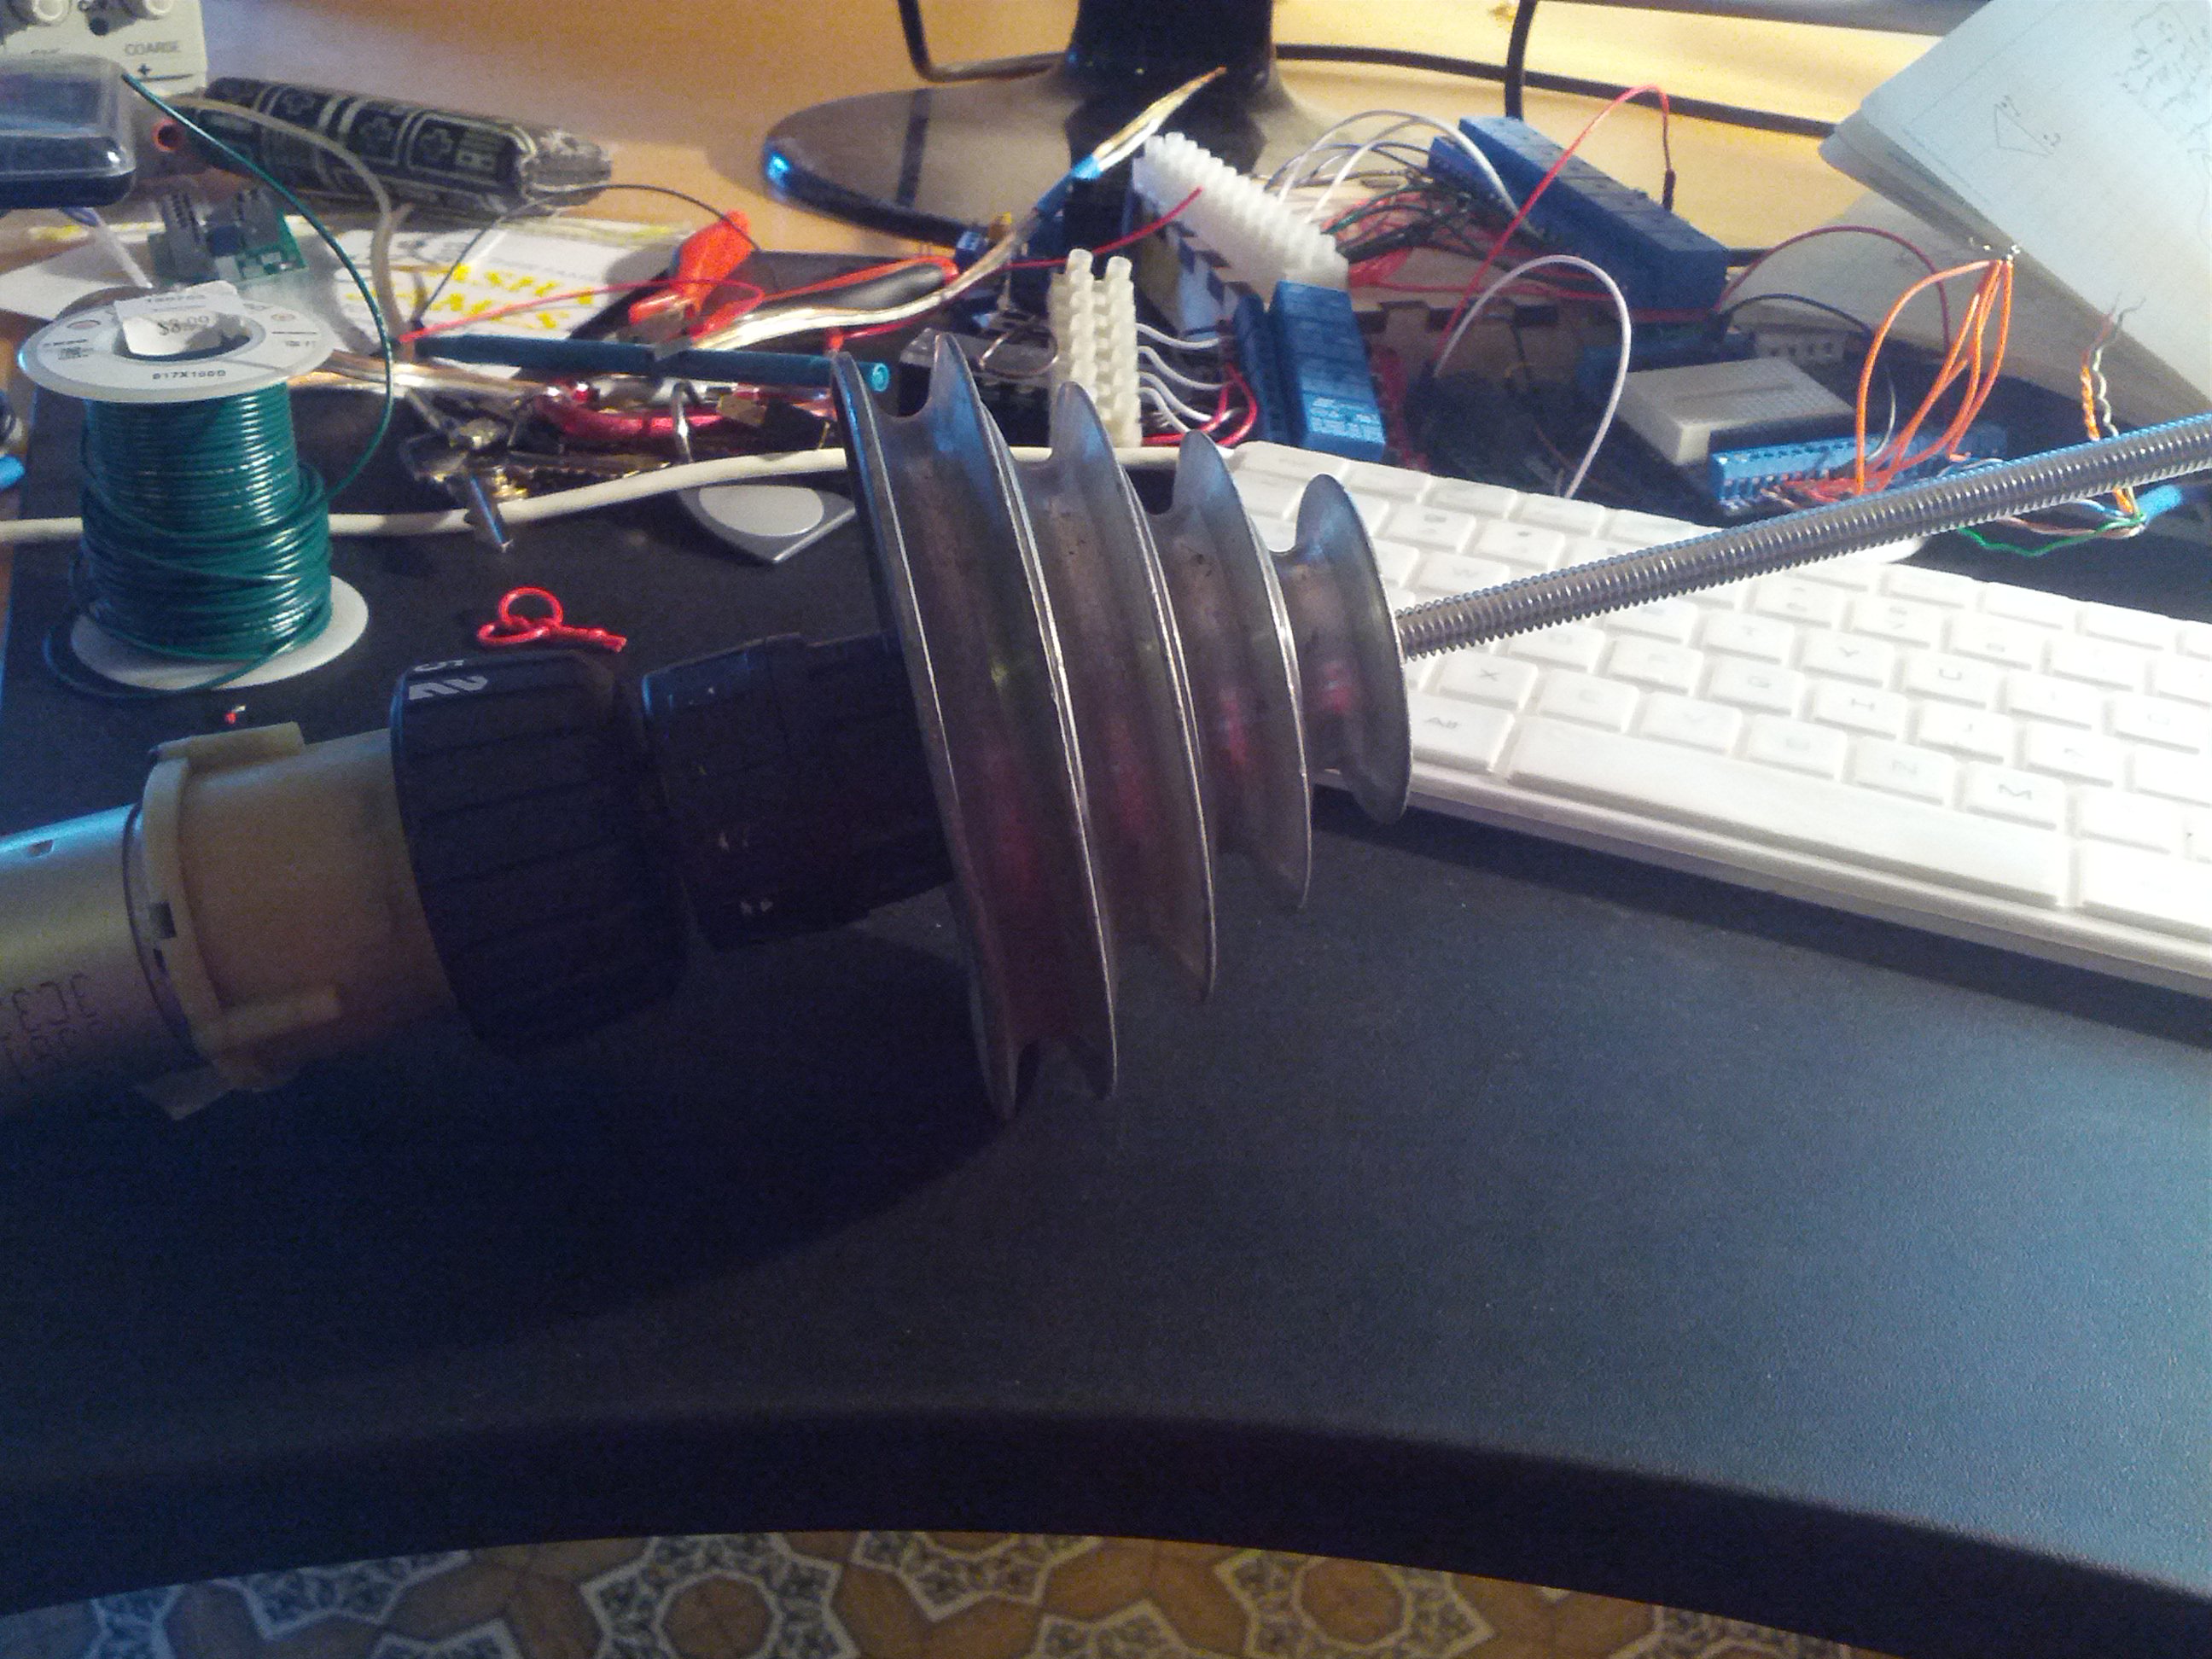
The XY table
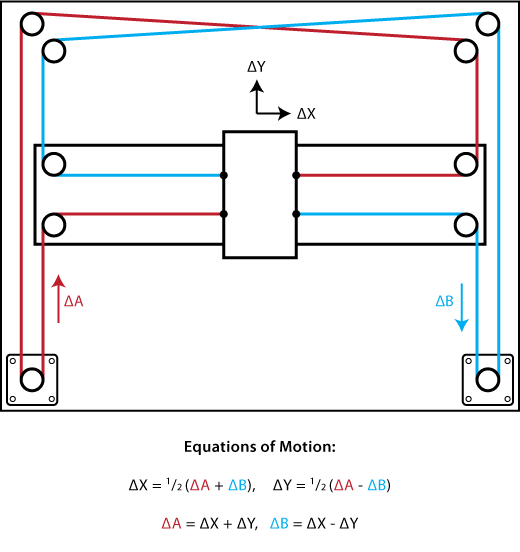 The XY table moves the claw around the cube. I decided to use the CoreXY (Cartesian Motion Platform) to do the actual movement. It works but there are many problems with it that I have not resolved yet.
 The biggest problems I am currently having is that the cables that I am using are slipping in the motor’s pulleys. I tried using some sandpaper to rough up the pulleys to add more grip but they keep slipping.

I thought about adding a idler pulley but I wanted to keep everything as simple as possible and I decided to add expansion springs to the cables to keep the tension on the motor pulleys. Its still slipping.
The problem also could be with the cables I am using. If the cables are too slick they will slide around in the pulleys, if the cable has too much give they will stretch under constant use. I had some parachute cord (paracord) around my house and decided to use it and this might be adding to my slipping.
Another idea is to wrap the cable around the pulley twice (540 degrees). This would ensure that there is tension on the pulley but the cable might get knotted up.
I have not resolved this problem yet and I am looking for a solution.

The Cart
I have not started this yet.
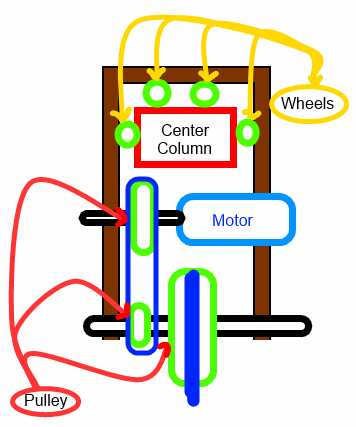 The cart will ride along the center column being pulled across by the cables. The card will have its own pulley on it that will be used to raise and lower the claw. Here is a crude drawing of what I was thinking about doing.
There will be one large pulley that will rise and lower the main claw. this pulley will be at the bottom attached at the center to a dowel that is free rotating in the walls of the cart… kind of hard to explain.
Control system
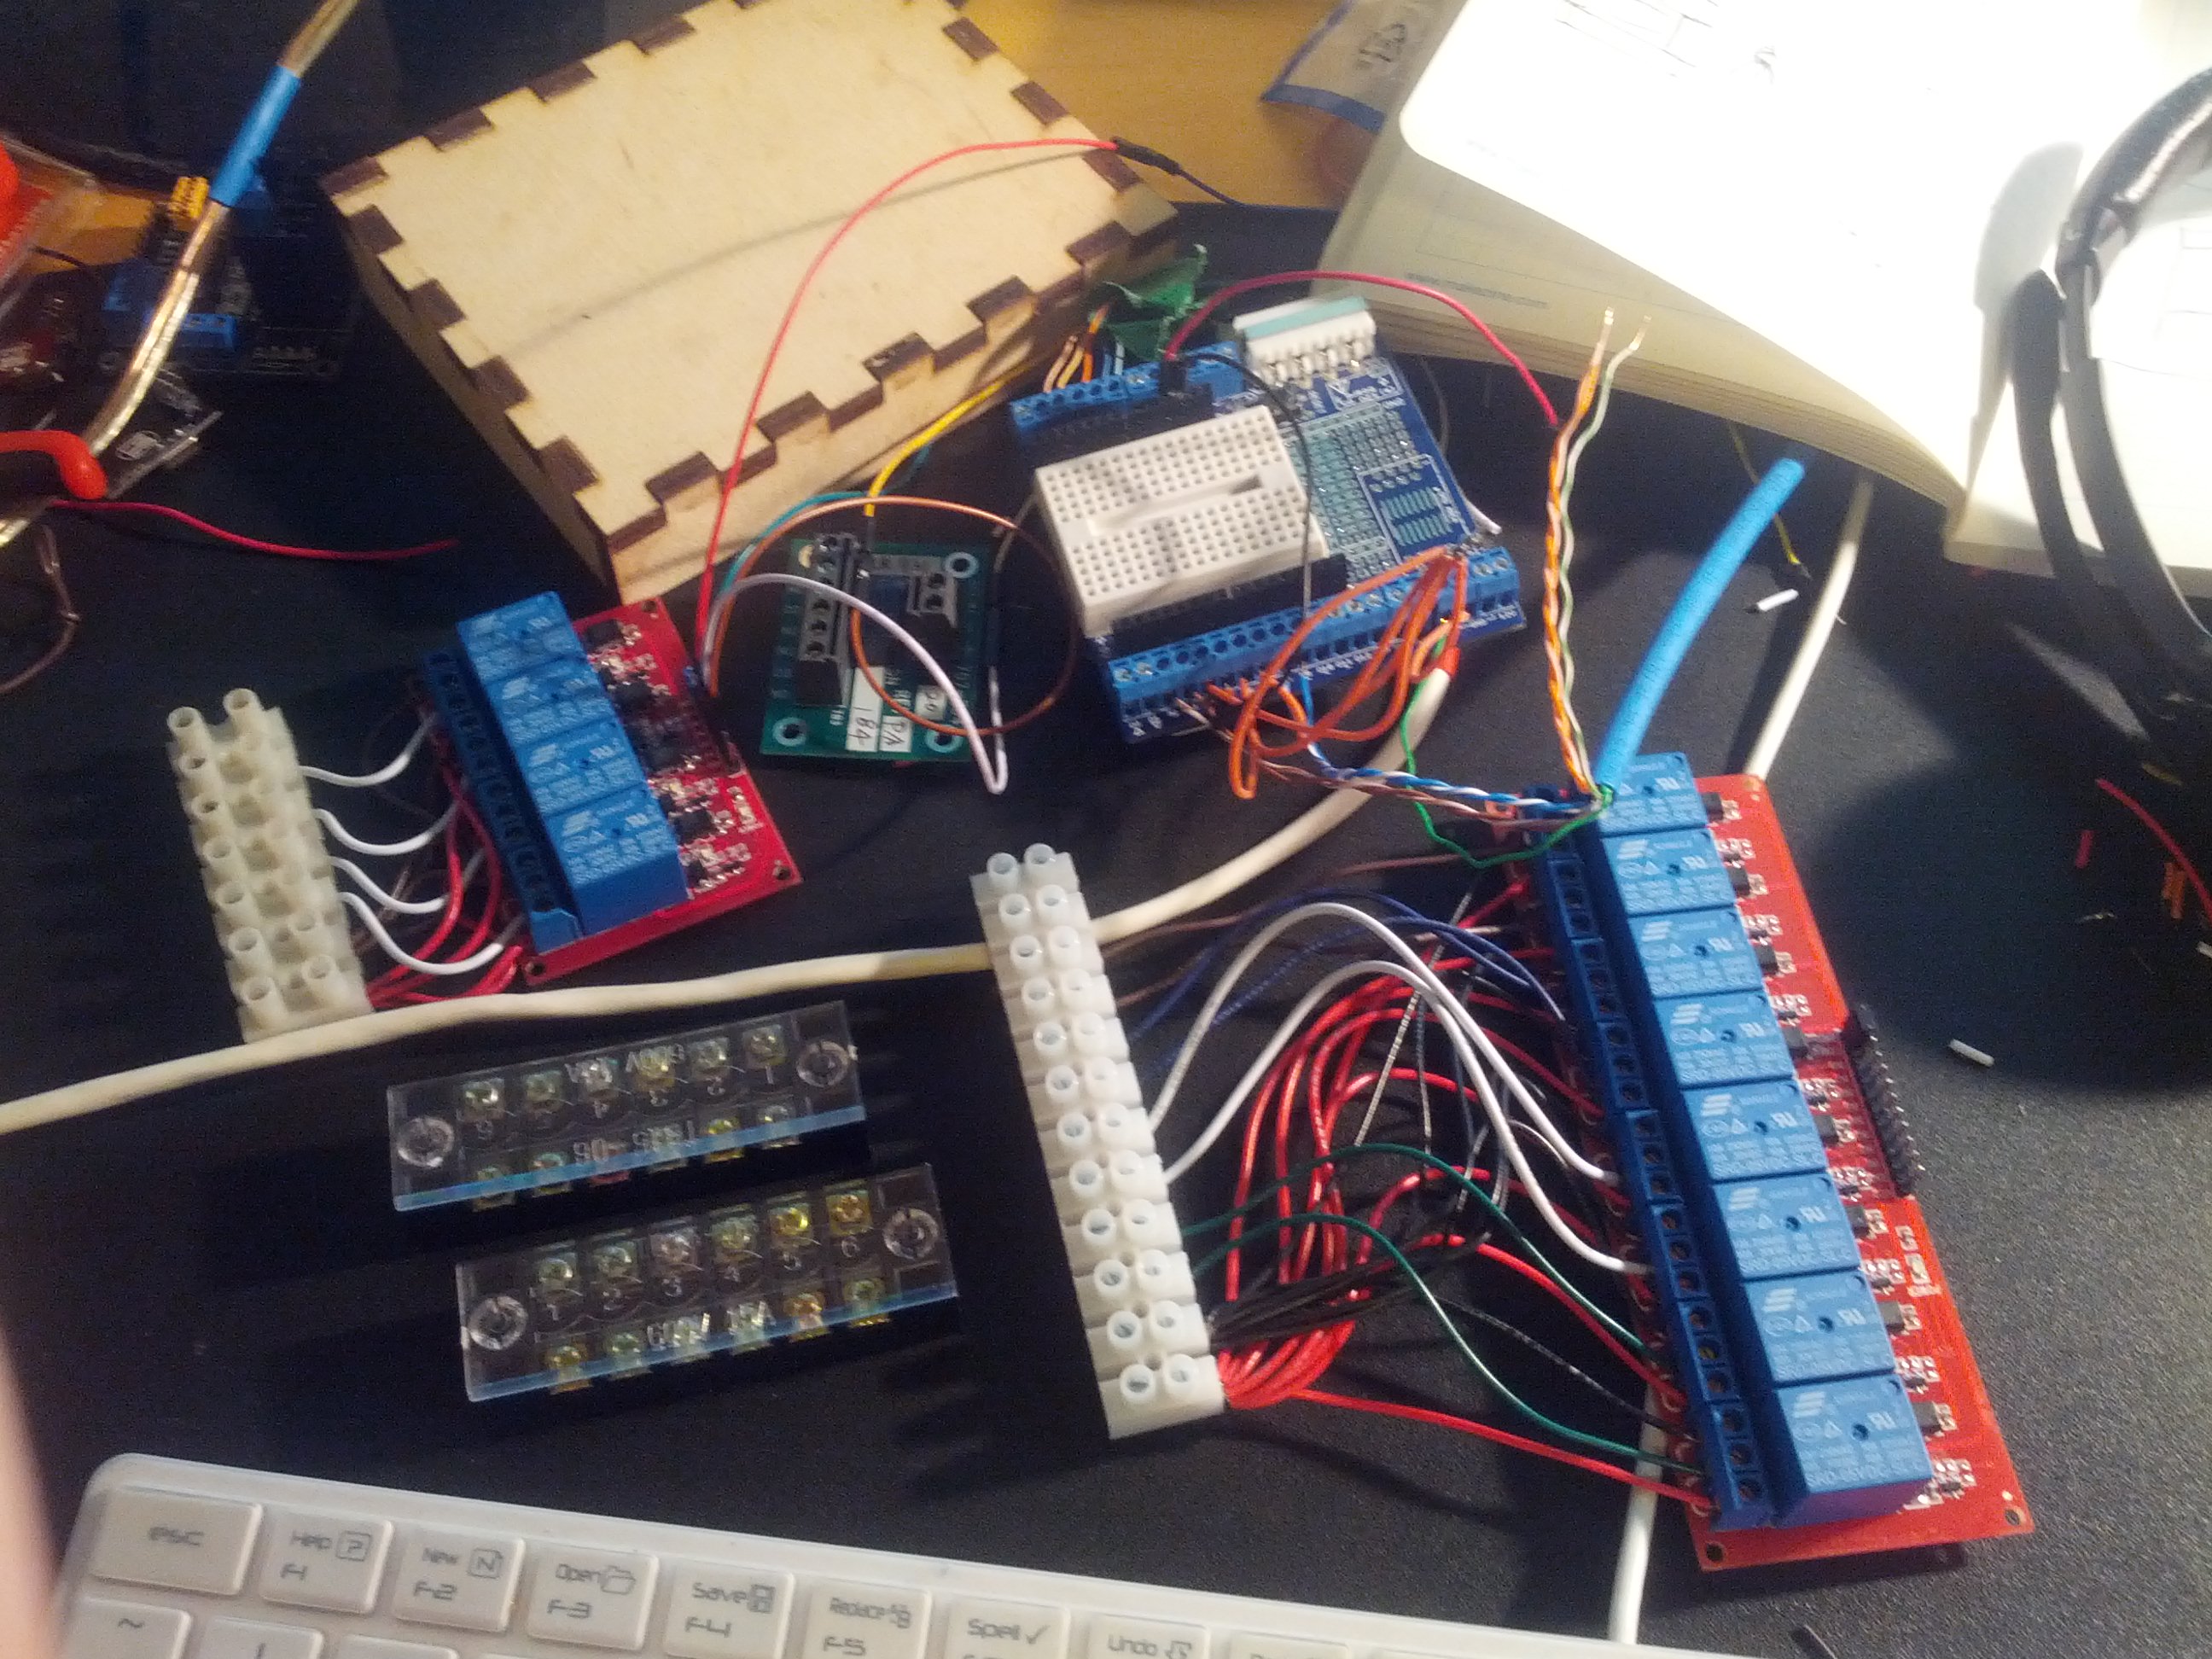
I am using a relay H Bridge to control the motors. Each motor needs two relays and two pins on the Arduino. There are a total of 4 motors in this system (8 pins). One each for each of the axis X, Y, Z and one more to open and close the claw.
I also used a lot of limit switches to tell when the claw is in a certain state.
- 4x for each axis on the gantry,
- 4x for each directions in the joystick,
- 1x for the fire button on the joystick,
- 2x for the min and max of the claw's teeth,
- 1x for the pulley to know when the call is fully retracted in to the cart.
A total of 20 pins. An standard Arduino has 20 pins, just enough to control the claw. I am trying to make all the connections with RJ45 connectors for an easier set up.
The programming for the Ardunio is nice and easy and pretty much done already.

Still lots to do and not much time to do it.
Leave a comment