
Tech Demo - Stained glass windows project
This post is part of a series on the stained glass windows project.
When starting a new project, I tend to create a series of tech demos of all the different techniques that I am planning on using in the project. This helps me find out what works and what doesn’t.
Below are some of the design questions that I wanted to solve while working on the tech demo.
How to attach the semi-transparent white acrylic inlay into the black border acrylic.
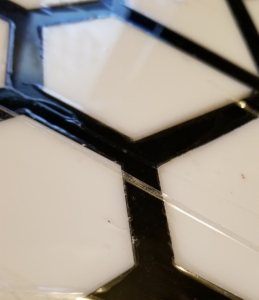
My first thought was to use Methylene chloride (acrylic glue). The issue with methylene chloride is that the parts have to be butted up to each other with no room for a gap. I could not guarantee that the laser cutter that I was using had tight enough tolerances that would prevent a gap from forming. Methylene chloride can also discolor acrylic and leave blotches or water marks that would be very visible when the light shines through the white acrylic.
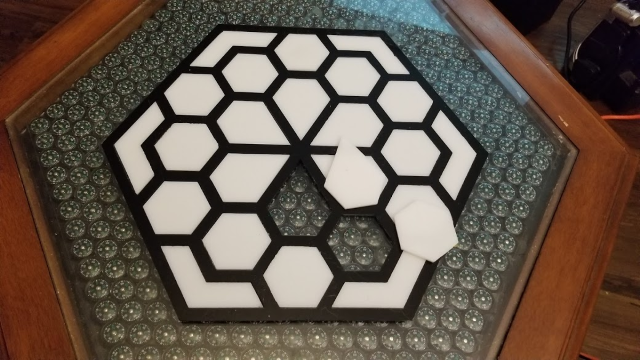
I thought about sandwiching the center plate between two clear plates of acrylic. This would be very expensive as each plate would need 4 layers of acrylic. Semi-transparent white inlay, Black borders, and two transparent sheets.
I ended up with the low tech method of using clear packing tape stretch across the entire plate on the inside. This worked quite well.
Dividers between the different segments in the design.
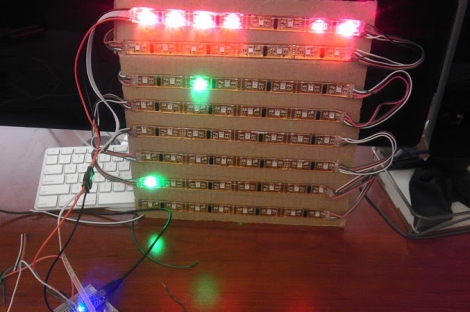
Each segment of the design has a individually addressable LED. I needed a way to prevent the light from one LED from bleeding into the segment of a neighboring LED.
My first idea was to use the laser cutter to create slotted dividers between each segment. This would have taken a bunch of time to design and I wanted to rapidly iterate on different designs.
I decided to use a bunch of card stock I had on hand then tapping the cardstock together. This left imperfections in the dividers as the card stock got crinkled or deformed. The black borders helped hide the imperfections in the dividers.
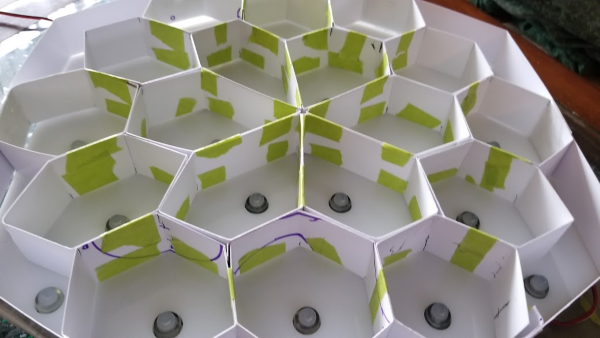
Finding the right height for the dividers that prevented LED hotspots
An LED hotspot is when the light from the LED does not diffuse, and you can see single points that are brighter than others.
One of the simplest ways to solve this problem, is to increase the distance from the LED to the diffusing panel. Finding the optional distance that doesn’t make your project’s profile too thick is always a challenge. Normally this comes down to trial an error. A good rule of thumb is twice the distance from the next closest LED.
Another solution is to add a wax paper as a diffusing material. I find that this doesn’t alway produce uniform results and I tend to avoid it.
In my case, most of the sections in my panels are 20 mm apart from each other. After a bit of trial and error I ended up using a divider with the height of 30 mm.
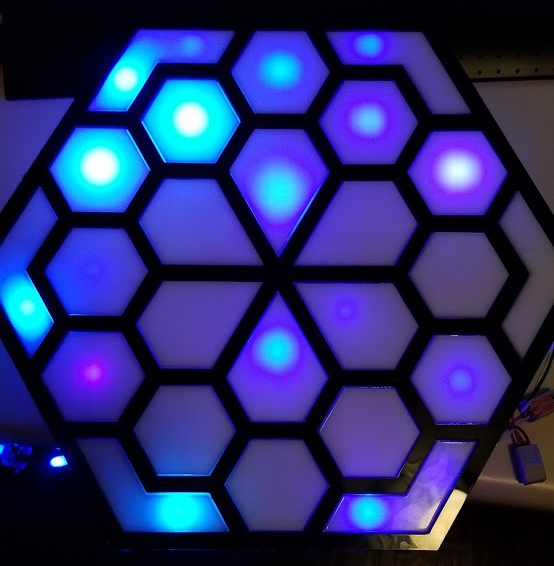
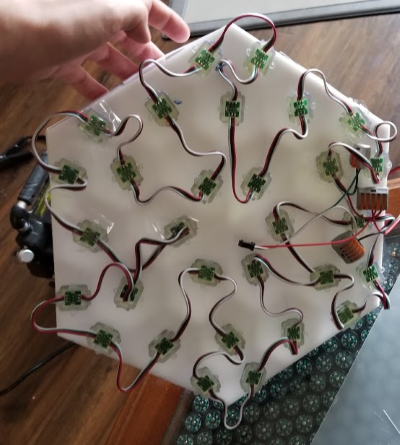
Positioning the LEDs in the segments
I need to layout the LEDs so that I could map and change the color of each segment independently.
I could have made a sheet of LED strips and map the LEDs to each segment. This would allow me to have multiple LEDs per segment when the segment were larger.
The issue is that many of the LEDS wouldn’t add value. LEDs under the dividers or in the corners of the segments. Mapping each segment would also take a lot of time.
Instead I used “Square” style LEDs that have mounting flanges built into them.
![]()
Then created a backplane for these LEDS to be mounted on. The backplane has a series of 11.5mm holes that aline with the in the center of each of the different segments. The issue with this choice is that it requires another sheet of acrylic behind dividers. This adds to the cost of this project.
Results
This was the results of the first tech demo. I am reasonably happy with the way this one came out. I discovered that the spacing between the segments could be a lot smaller. In this tech demo I used 10 mm spacing. In later designs I shrunk the spacing down to 3mm.
Leave a comment