
Wood frames - Stained glass windows project
This post is part of a series on the stained glass windows project.
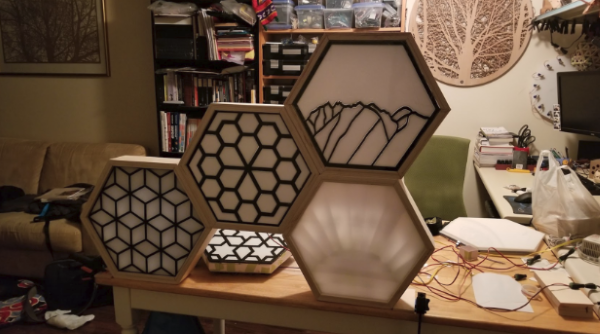
I been told that in the past that some of my projects have not been finished up well. After the technically interesting parts of the project are done I move on to the next project without adding that final layer of paint, or creating a box, giving it a name, etc. This project I wanted to spend the extra time to add a frame and other finishing touches to complete this project properly.
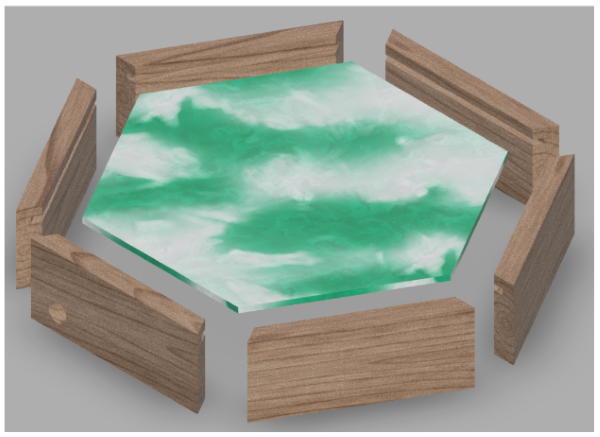
I was looking for a simple frame that would protect the acrylic and the electronics while fading into the background not taking too much attention from the work itself. I decided to use 3/4 inch thick baltic birch plywood. It a lightly colored wood, easy to work with and the plywood layers would look good next to the leds.
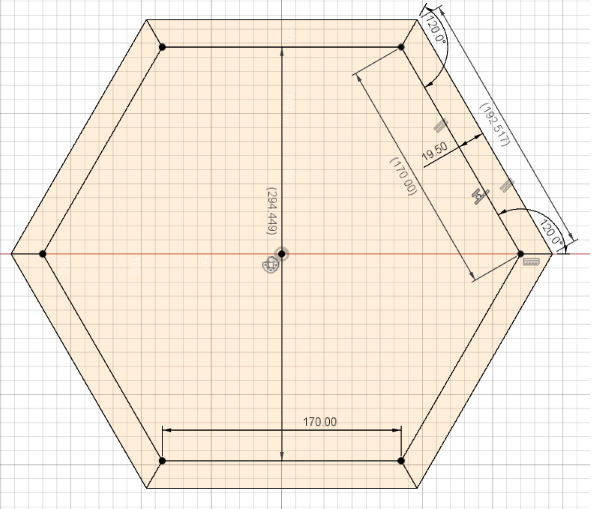
I design the frames in Fusion 360. It made it easier to get the measurements right and I could try a few virtual iterations without having to wasting materials on failed ideas. Fusion 360 has a nice feature that allows you to share a public interactive view of your design. People can add notes, markup and provide feedback from the interactive few. I don’t have a lot of practice with working with wood so this was very helpful when asking for feedback from my more experience woodworking friends.
I added a grove, one centimeter from the top of the frame. This allowed me to insert the acrylic panel into the wood securing it into place. I was worried about using any fasteners as they would shine thought when the LEDs are illuminated.
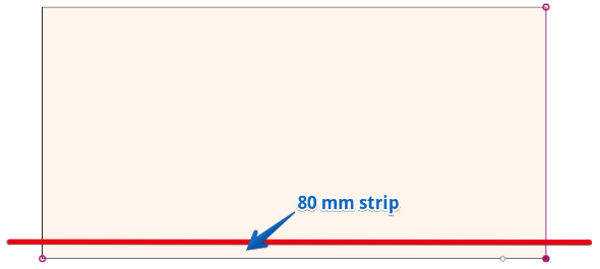
I decided to make the frame 80 millimeters high to allow for space for the cell divider, the LED panel, and LEDs and the electronics. I probably could have made this as small as 60 millimeters without too much issue. But after making the first frame I decided to keep them all the same height.
I started with a 4’x8’ 3/4” sheet of baltic birch plywood and cut a 80 mm strip using the table saw. 80 mm being the height of the frame.
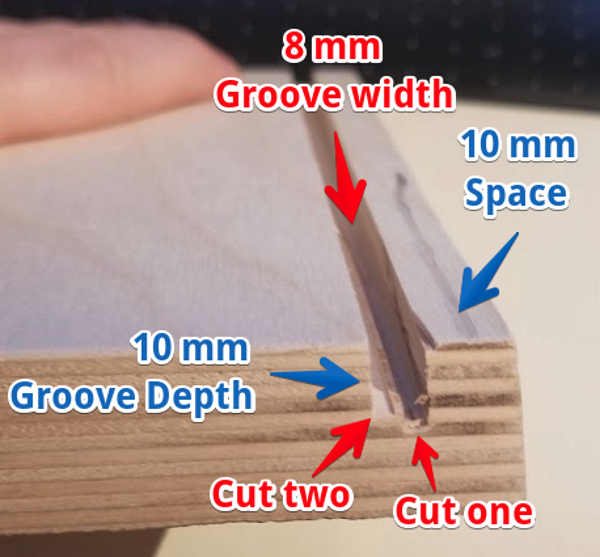
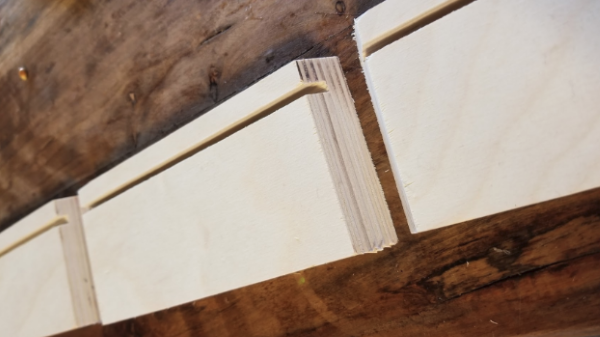
To cut the groove for the acrylic plate to be seated in, I lower the table saw blade so that only 10 mm is extended from the deck of the table saw. This is the 10mm depth of the grove for the acrylic plate. Then moved the table saw fence so that it is 10 mm from the blade of the saw. This will be the 10 mm spacing between the grove and the top of the frame.
The saw blade that I was using was only 4mm thick and my acrylic is 6mm. I expanded the grove by moving the table saw fence from 10mm from the blade to 14mm from the blade. You can see from the photo below the two distinct cuts. This happens because I accidently bumped the height of the saw between cuts.
Next I cut the sides of the frame from the 80 mm strip. The frames have two concave 60 degree angle cuts. 60 degree x 6 sides = 360 full circle. I changed the angle of the saw blade to 60 degree, using the magnetic electronic tilt gage to get the angle just right. The angle measurements on the table saw are rarely accurate.
I added a stop block on the cross-cut sled 192 mm from the blade. Cut the edge so that the concave part is on the same side as the grooves and repeated this step until I got 6 frame segments.
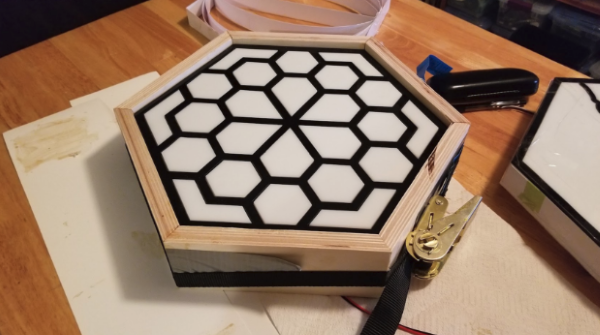
After some light sanding, I added wood glue to the edges of the frame. Inserted the acrylic panel into the groove near the top of the frames, then used a tension strap to clamp the frames together.
24 hours later after the glue dried. I resanded everything to remove the glue drips. Then added a polyurethane clear coat to the wood to finish it off.
Leave a comment