
Designing panels - Stained glass windows project
This post is part of a series on the stained glass windows project.
While designing the different patterns for the stain glass window project, I used two applications; Autodesk Fusion 360, and Inkscape.
I start my the design in Fusion 360 sketch tool. Fusion 360 makes it easy to create geometry with algorithms and math. Every line is the right length at the right angle. Fusion 360 also allows you to create geometry with python scripts, allowing me to program in the different patterns.
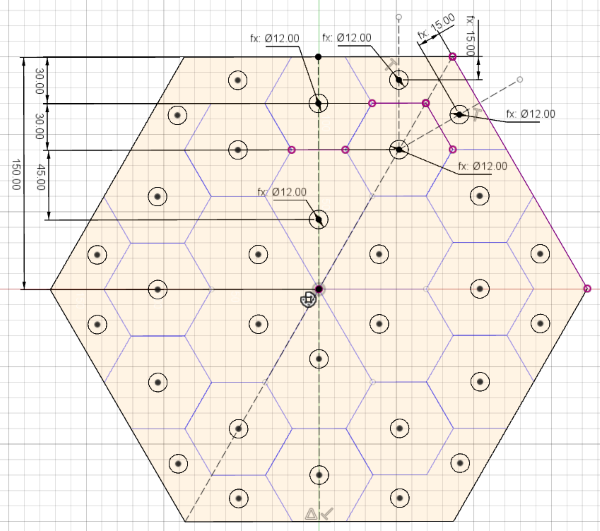
After I get the design in Fusion 360 to a good state, I create the drill pattern. The drill pattern creates holes in the center of segments for the LEDS to be mounted in. I have created a python script that does this for me, but this could easily be done by hand. Afterwards I export the drill pattern and the geometry pattern as DFX files.
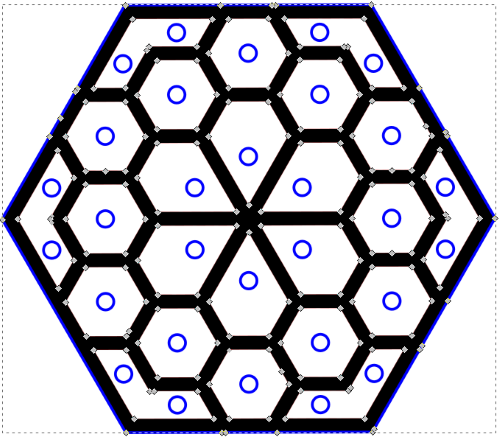
Next I import the DFX files into Inkscape. DFX files don’t include scaling and unit information in the contents of the file. When importing a DFX file into inkscape or other tools the patterns can sometimes become stretch and distorted. When the file gets distorted, I find a segment in the pattern with a known size, then use this known size to scale the entire pattern in inkscape.
Then I create the black borders of the pattern by setting the stroke size of the lines the geometry pattern to have a size of 6mm. This thickens up the black borders allowing me to hid the mistakes from the cardstock dividers. Then I convert the “Stroke to path” and “union” all the paths objects into a single object. I save the pattern as a SVG file that includes scaling and unit information. The pattern is now ready for the laser cutter.
All the laser cutter panel files can be found on my github account. StainGlassLaserPatterns
Leave a comment